Now that the server is built and you have checked all the connections are good, the memory and any cards you might have installed are properly seated in their sockets, fans are installed correctly and are not obstructed, etc, it’s time to see if it clears the POST checks.
POST stands for Power On Self Test and it’s basically a series of tests a computer conducts on itself before it allows the OS to boot up. If any of these tests fail, the computer won’t successfully complete its POST and the OS doesn’t get to boot up.
¶ POST Check With Attached Monitor and Keyboard
The easiest way to check if the server has passed its POST is to connect a monitor and keyboard to it and switch it on.
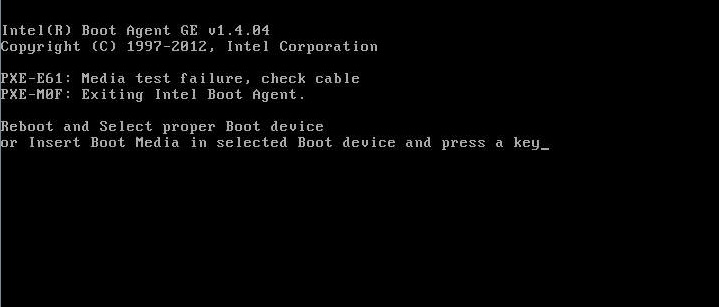
If all goes well you will see various pieces of information on the screen coming and going. But when everything has settled down you should see a screen that looks something like this.
¶ POST Check with IPMI
Connect the servers IMPI NIC to the router via a network cable (you do not need to connect a monitor or a keyboard) and switch on the server.
The IPMI NIC on Fester’s server is this one, yours might be different.
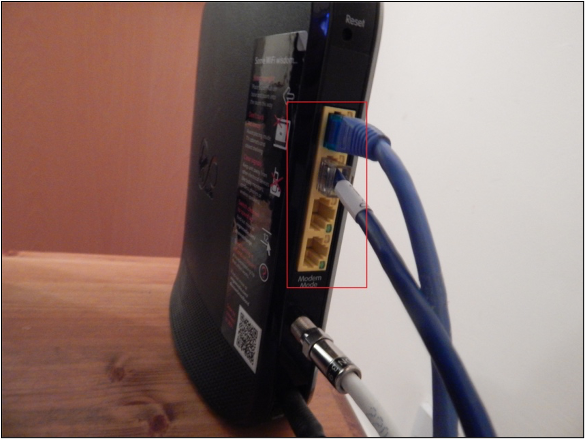
The other end of the cable goes to the network connection on the router. On the POS router it is here:
Now switch on and boot up a personal computer that connects to the router, if you use it to connect to the internet then this will probably work, in any case it must be part of your private network.
At this point the IP address for the IPMI web GUI is unknown. This is because we have not assigned a static IP address to it yet, so probably the DHCP server in the router will automatically give it one. Whatever the case, we need to go and find that address.
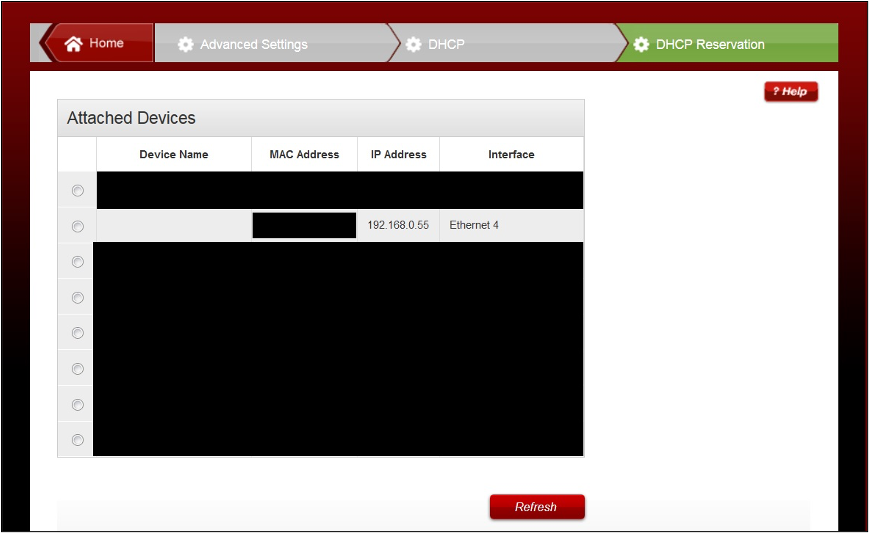
The easiest method is to log into your router and find it. In the POS router it’s in a table listing the currently connected devices (your router might be different).
Now open up your web browser and type in the IP address you got from your router and hit the “return/enter” key. The IPMI web GUI should be displayed. It should look like this:

Now type in the default Username and Password and log in.
Username = ADMIN
Password = ADMIN
(You should seriously consider changing the default Username and Password. If you want to do that now look at the relevant section in this guide.)
You should be looking at a screen like this:

If you get a message about Java needing to be updated just click the “Cancel” button.
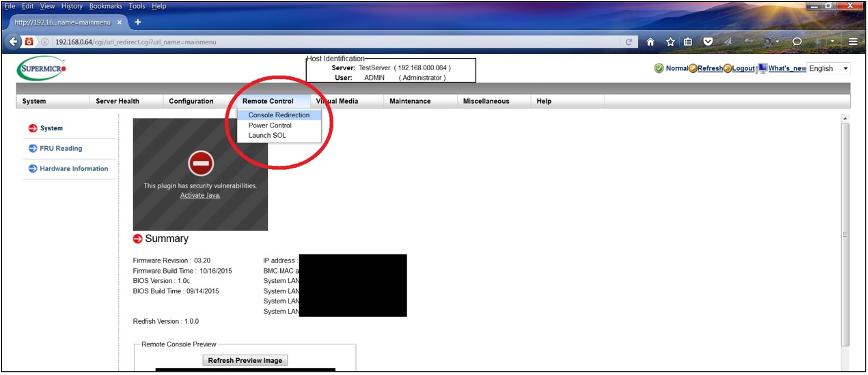
Go to the “Remote Control” drop down menu and click “Console Redirection”:
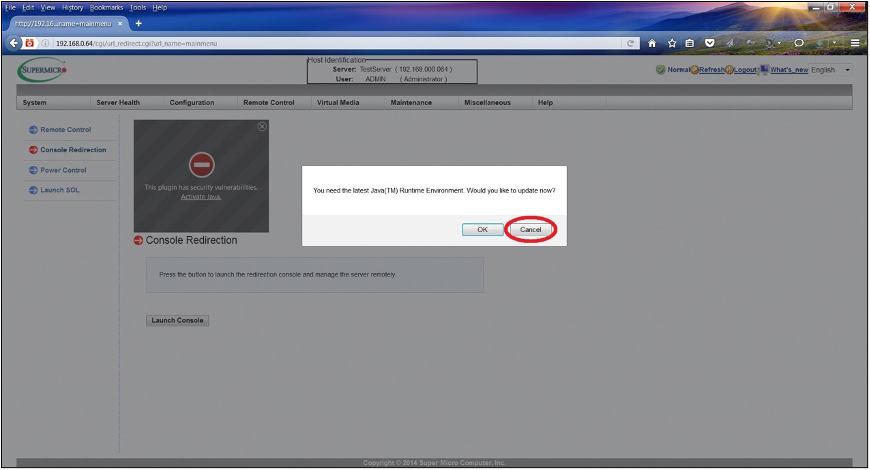
You should get a screen something like this. Just click “Cancel” regarding the Java update message:
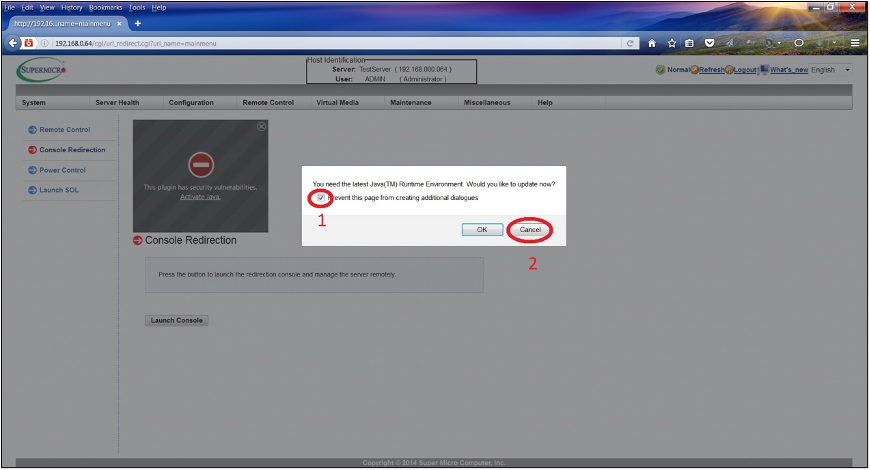
You will probably get a screen like this. If you do, tick the little box (1) and click the “Cancel” button (2):
There should be no more pop-up messages now.
Click the “Launch Console Button” (1). A little window will pop-up, make sure the “Open with” radio button (2) is selected and “Java™ Web Start Launcher” (3) is selected from the drop down selection box then click “OK” (4):
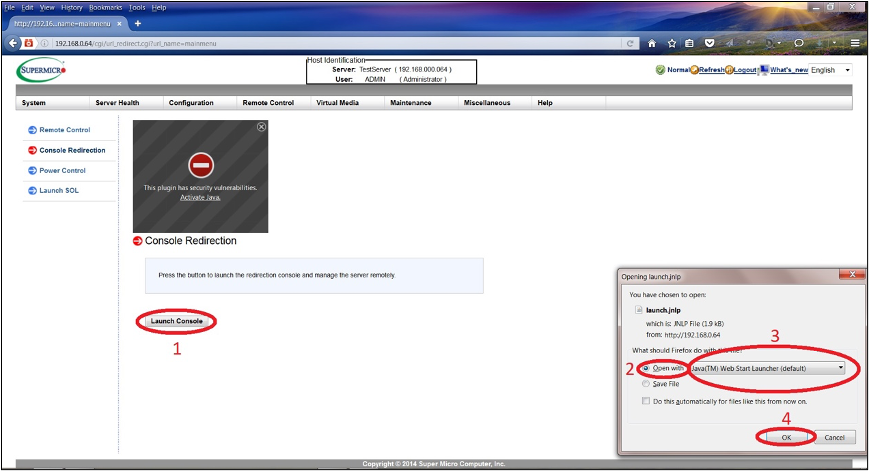
The JAVA iKVM Viewer window should pop-up (shown with a red box around it here) showing the video on your remote server. You can also enter text via the keyboard.
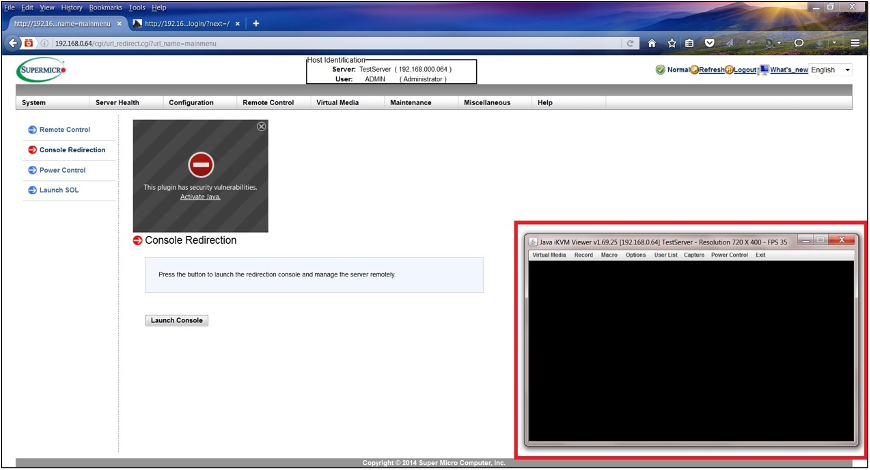
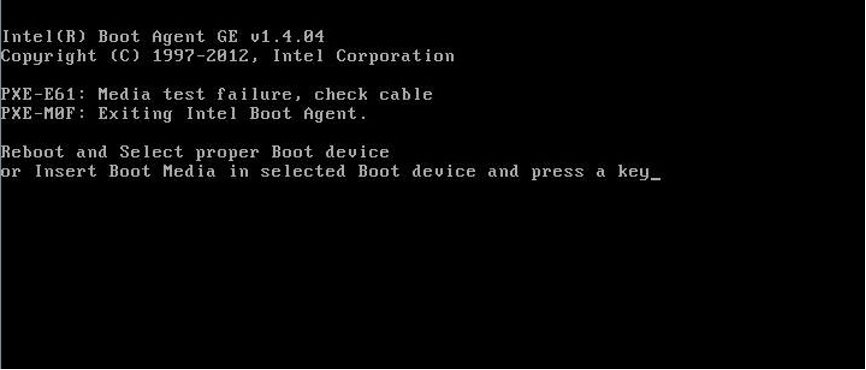
The previous screen shot shows a blank window, but if the server has cleared its POST you should see in this window something like this.
If for some reason you can’t find the IP address for the IPMI web GUI in your router then use an IPMI viewer program to discover it.
¶ IPMI IP Address Discovery Using An IPMI Viewer Program In Windows
Download an IPMI viewer program and install it.
I used a Supermicro program for this. It is available to download from their ftp web site.
Install the program under an Administrator’s account or right click on the installation program and run as an Administrator (have your Administrator’s password ready).
When the program is installed run it under an Administrator’s account or right click and run as an Administrator.
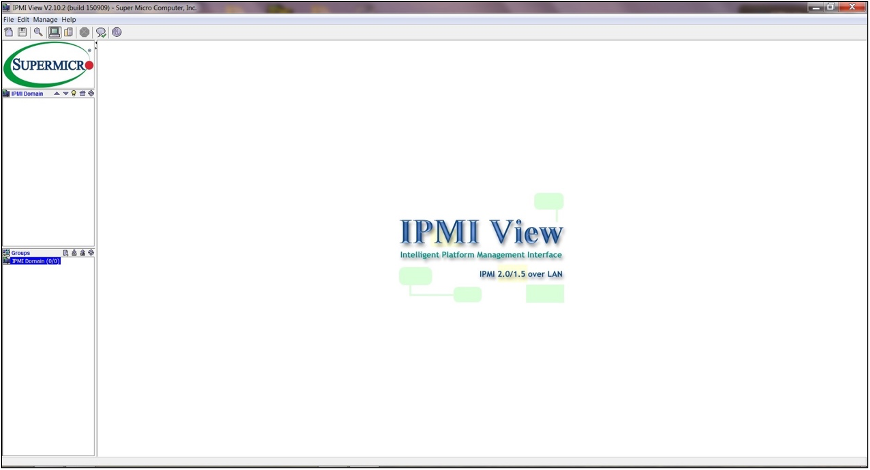
You should see something like this:
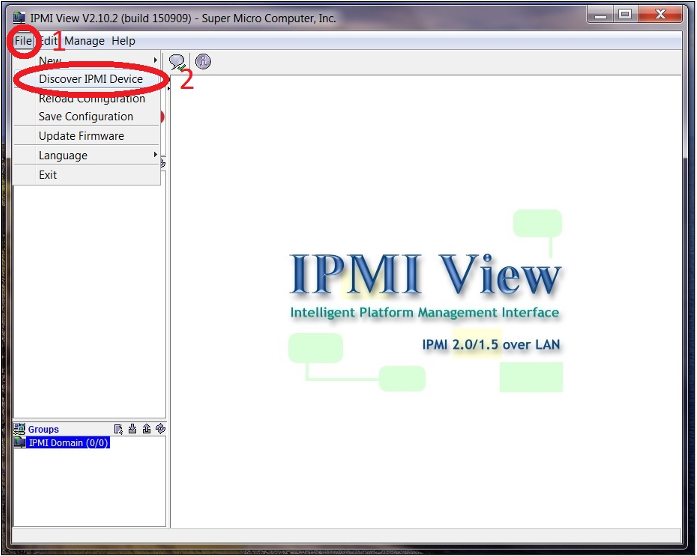
Now click on the “File” (1) drop down menu and click “Discover IPMI Device” (2).
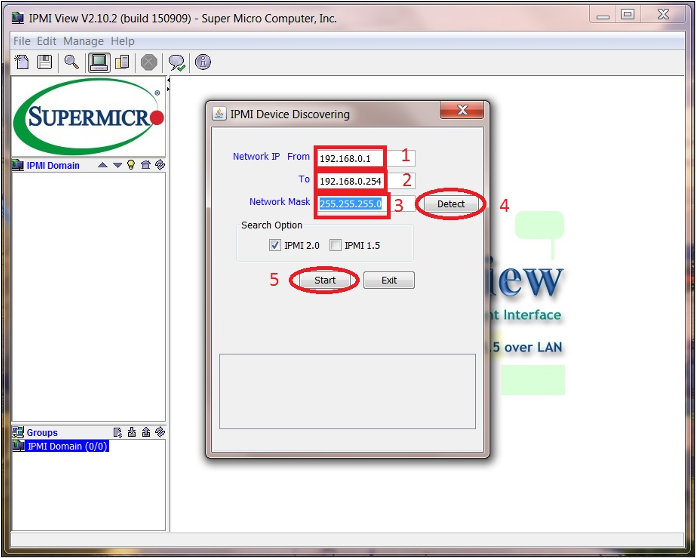
In the little pop-up window put in the start IP address of your private IP address range (in Fester’s case that is 192.168.0.1) in the “From” text box (1) and the last address in the range (in Fester’s case that is 192.168.0.254) in the “To” text box (2). In the “Network Mask” text box enter the value of the subnet mask you wrote down earlier (3) (Fester’s is 255.255.255.0). If for some reason you could not get that information then click the “Detect” button (4). The “Search Option” relates to the version of IPMI (Fester’s board uses version 2, if you don’t know the motherboard manufacturer will be of some help here). Now click the “Start” button (5) and the program will search for an IPMI device on each IP address in the range specified.
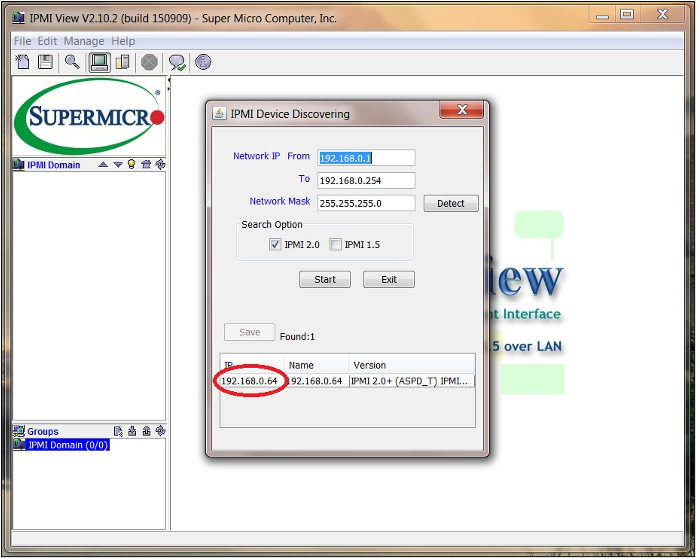
If your search is successful, you should see something like this, with the IP address of the IPMI web GUI clearly shown.
¶ IPMI IP Address Discovery Using An IPMI Viewer Program In Linux
If you are using Linux I can’t help you as I don’t know how.
If someone would like to provide some information with copyright free screenshots I will try to include it in the guide or you could replace this or any section with your own?
¶ A Possible Problem With Quiet Servers Using Low RPM Fans
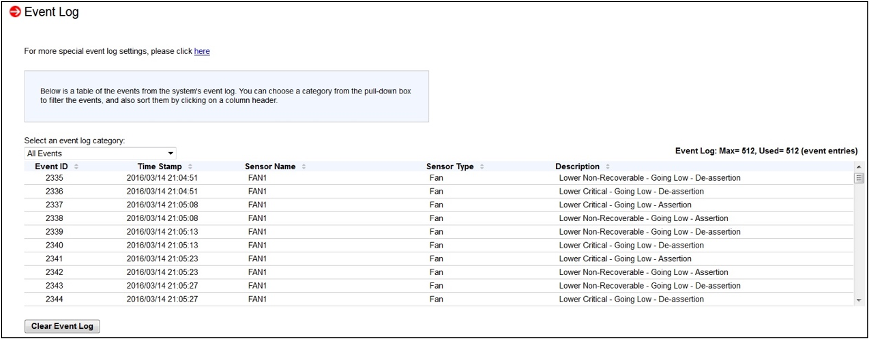
If after building your server you notice that the fans in the system are spinning up and then spinning down in a continuous cycle (sounds like the server is trying to achieve flight, then gives up, then has another go) and is generating event log entries similar to the screen shot shown then take a look at Appendix 4. This may provide some help.
