¶ Pools
¶ What is a pool?
A pool is the basic unit of storage in ZFS, and therefore in TrueNAS. A pool consists of one or more data vdevs[1], and a vdev in turn consists of one or more devices, though two or more are highly recommended for the sake of redundancy. While ZFS generally can use whole drives, partitions, or individual files to create vdevs, TrueNAS limits this to whole drives.
¶ Basic pool design
The design intent of ZFS is that all your storage be combined into a single pool. This guide recommends following that intent, unless one or more of the following apply:
- You need significantly different redundancy or performance characteristics for different kinds of data.
- e.g., some of your data needs to survive failure of two or three drives, while other data only needs to survive failure of one drive.
- You want to use both spinners and SSDs for your storage--combining those into one pool wouldn't make much sense.
If you're planning to use applications on TrueNAS SCALE, it's generally recommended to have a SSD pool for those applications. Bulk storage would ordinarily be on spinning rust, though as SSD capacity increases and price decreases, a SSD-only storage pool is becoming more feasible for many users.
¶ Creating a Pool in TrueNAS CORE
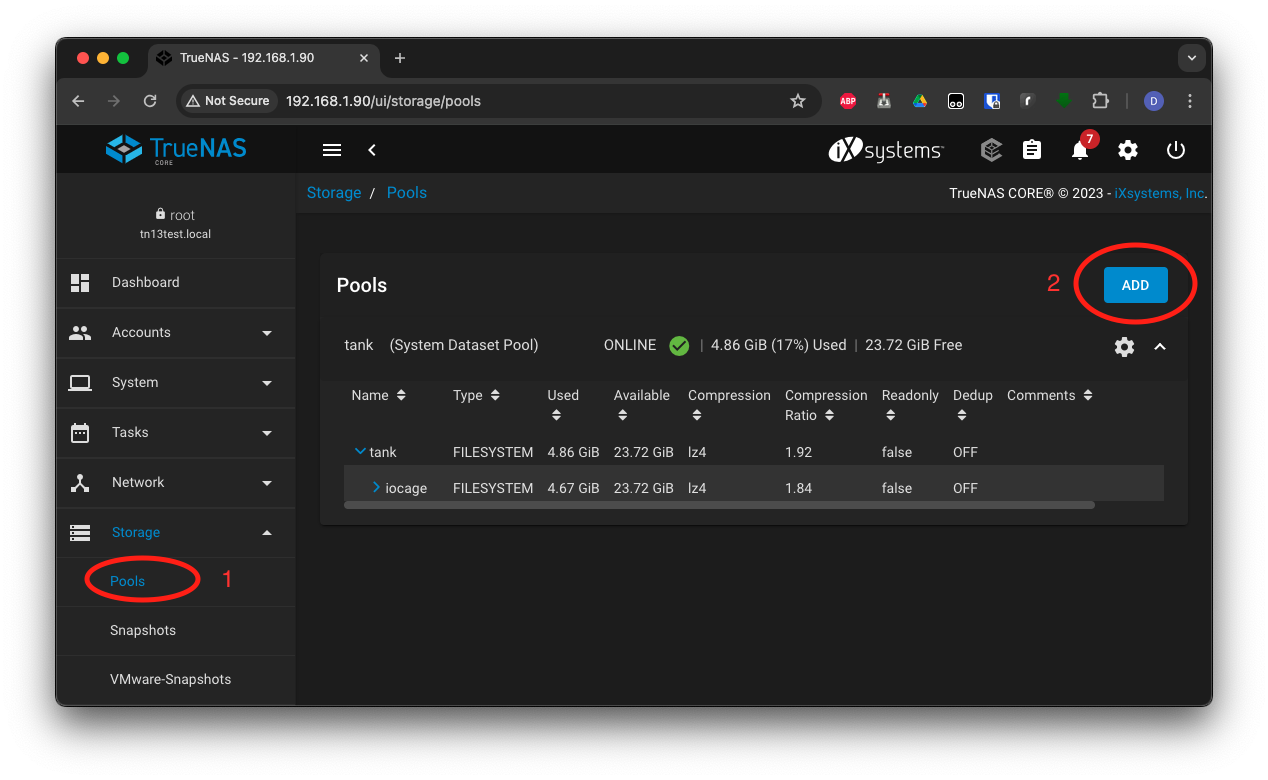
To create a pool in TrueNAS CORE, log into the web GUI and go to Storage -> Pools (1), then click on the ADD button (2).
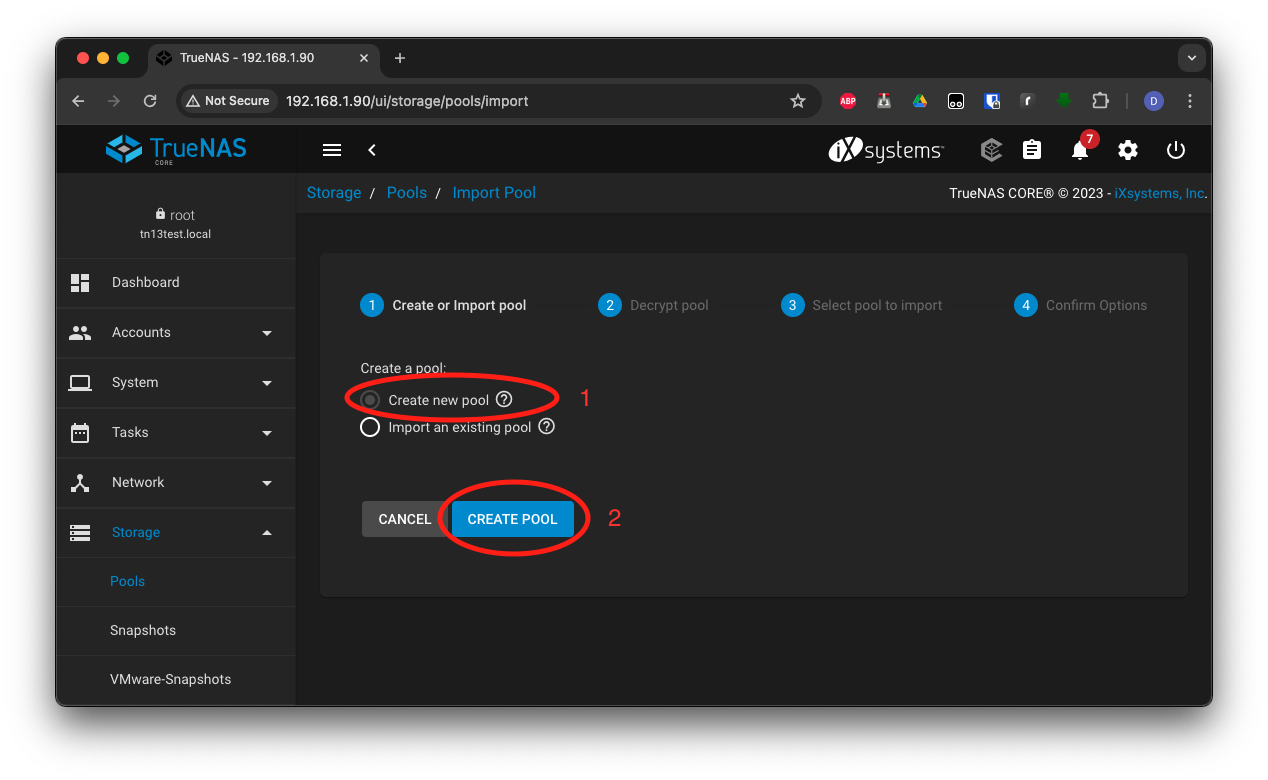
On the next screen, leave the radio button set to its default of Create new pool (1), then click on CREATE POOL (2).
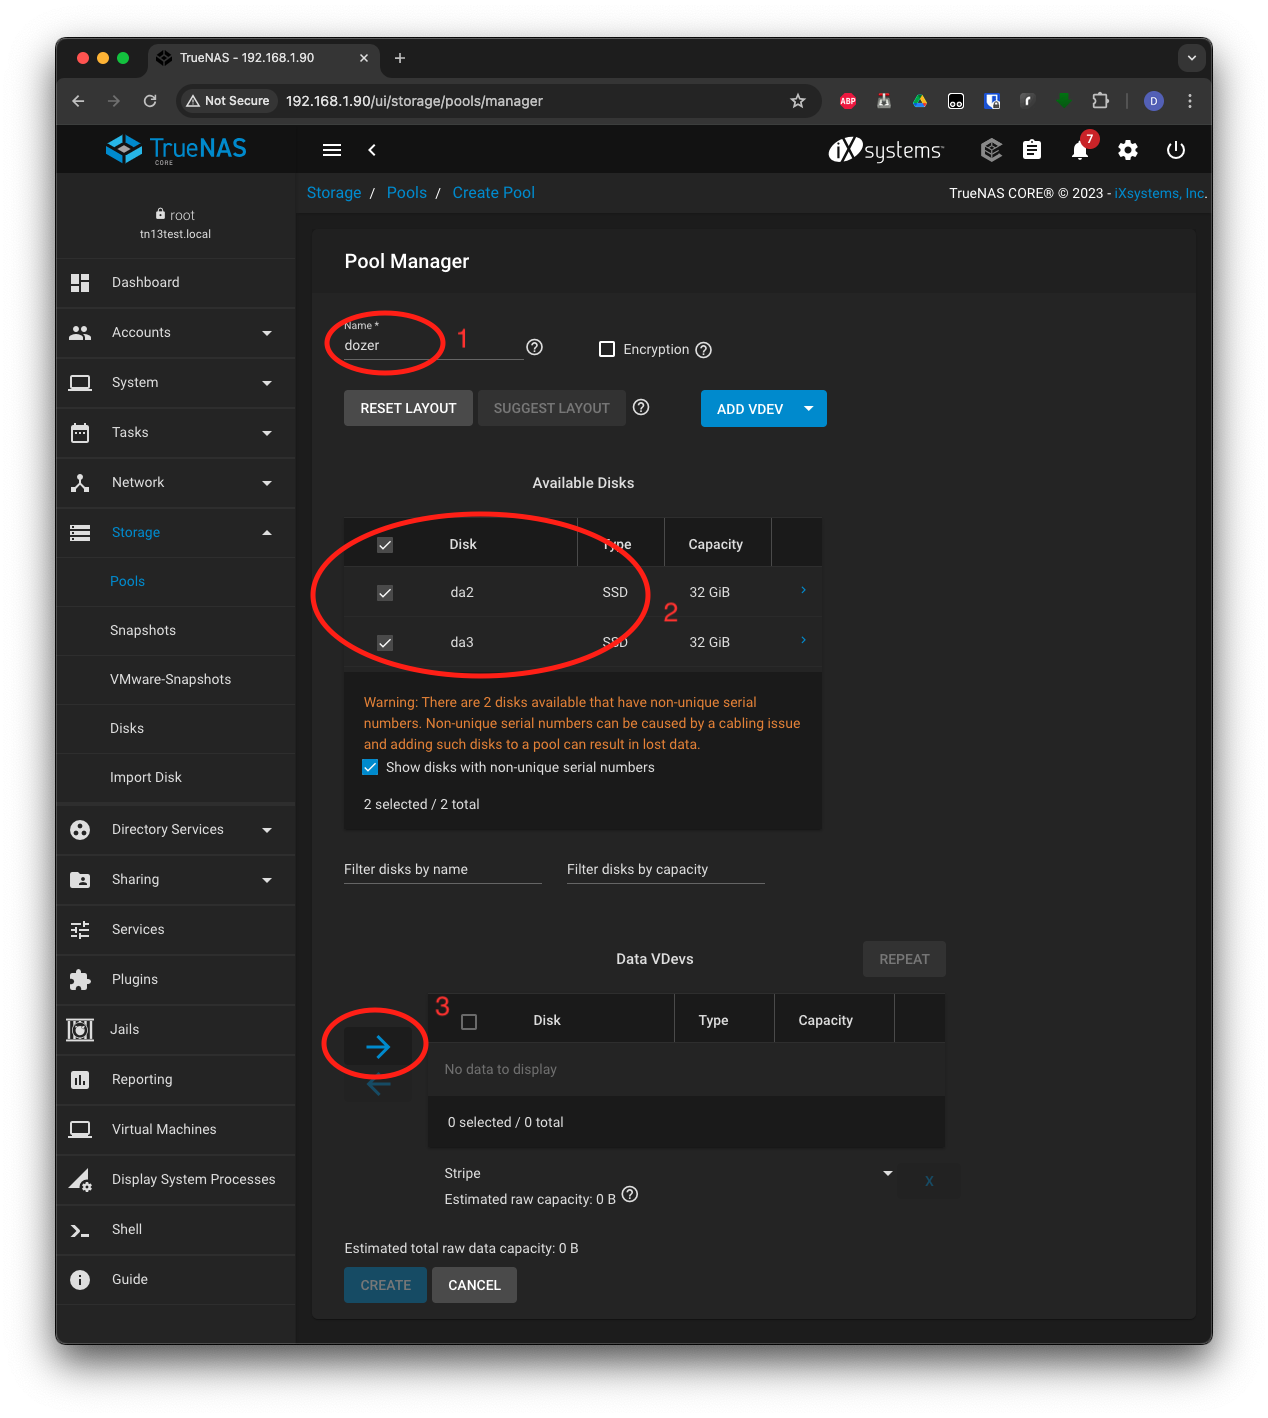
On the next screen, enter a pool name (1) and select the drives you want to add (2) (the warning about non-unique serial numbers shouldn't appear for you). Then click the arrow (3) to add them to a vdev.
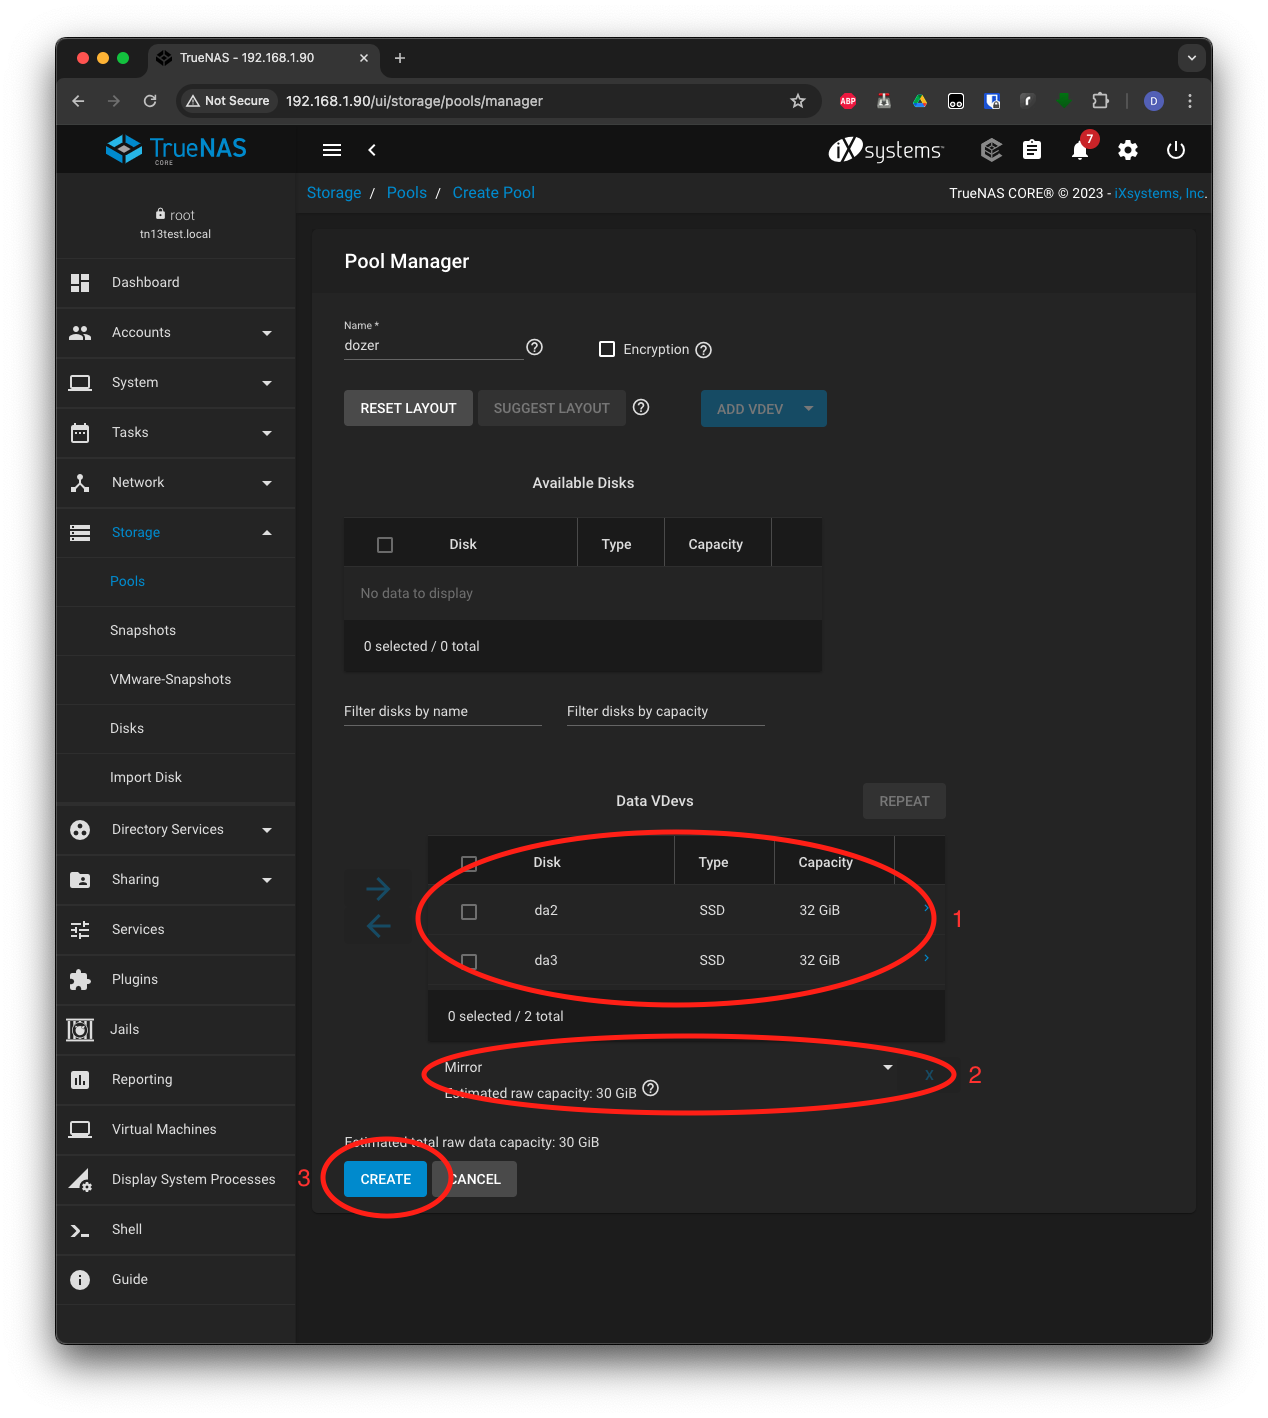
Once the drives are added to the vdev (1), set the vdev layout appropriately (2, mirror in this case), then click CREATE.
In the popup warning window, check the box to confirm that the contents of any disks you're adding to your pool will be lost, then click CREATE POOL. Your pool will be created.
¶ Creating a Pool in TrueNAS SCALE
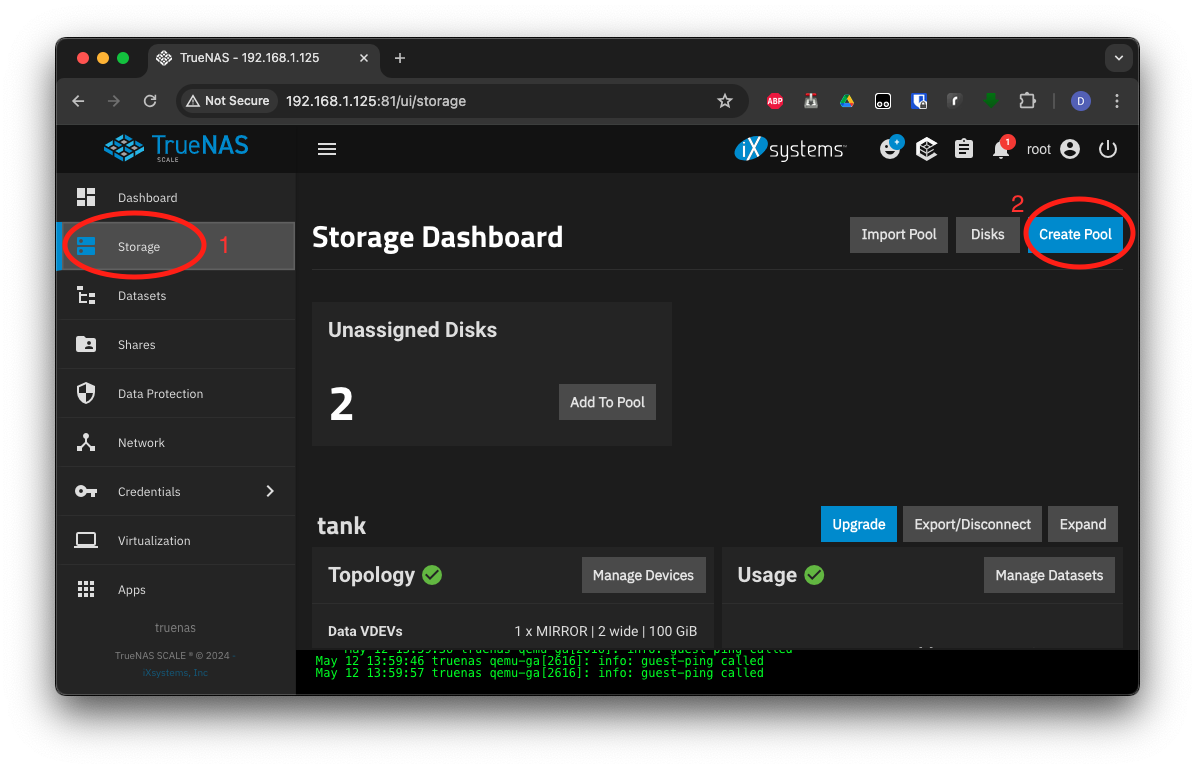
To create a pool in TrueNAS SCALE, log into the web GUI and click on Storage (1), then Create Pool (2).
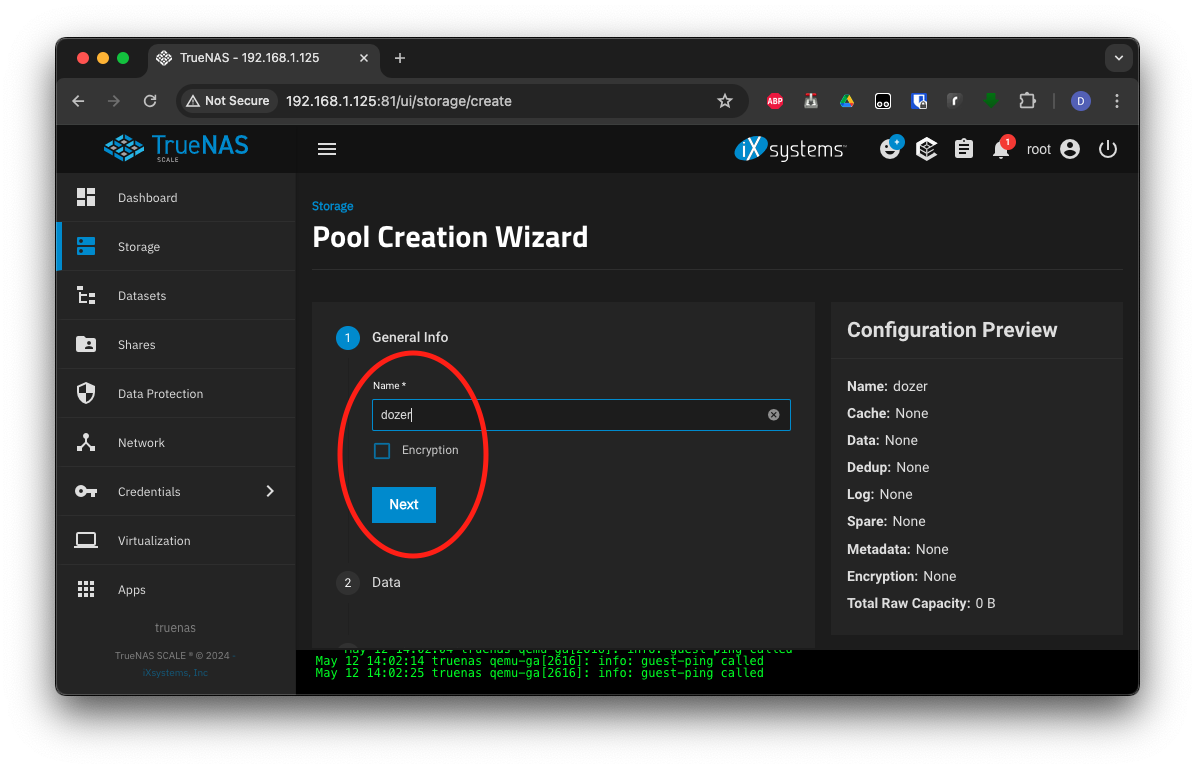
Enter a pool name, then click Next.
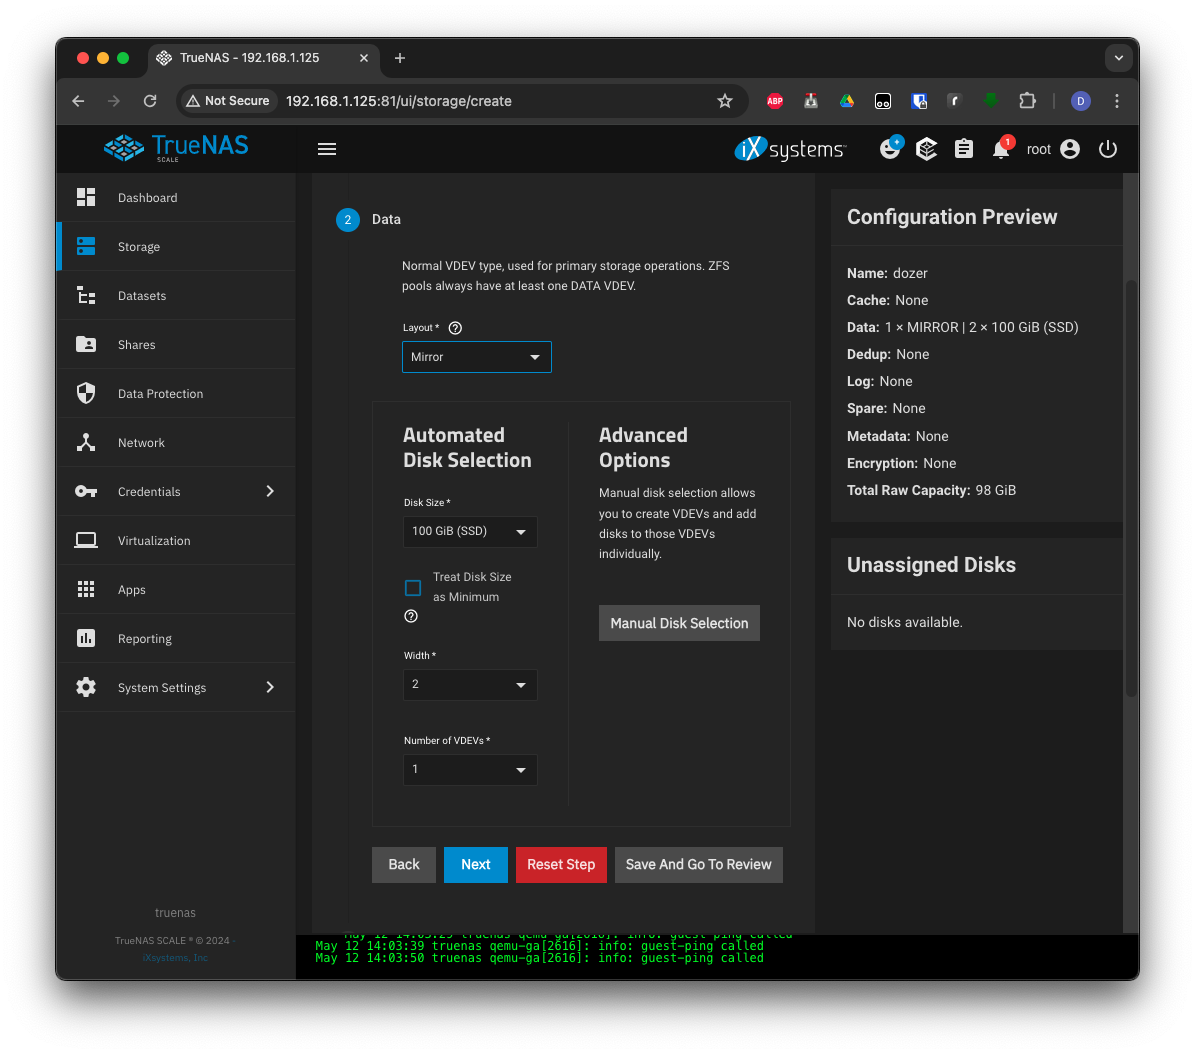
Under the Data heading, select your desired layout ("Mirror" in this example). The system will suggest a layout that seems appropriate under the heading of Automated Disk Selection. If you feel the need to adjust this manually, you can click the Manual Disk Selection button. Once finished, click Save And Go To Review--the other pool options won't be used in this example.
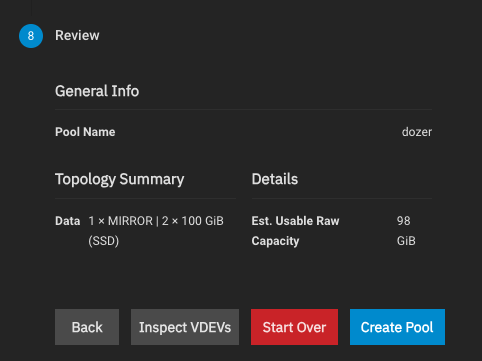
In the Review section, you'll be able to see the summary of how your pool will be created. Click Create Pool to create the pool.
In the popup warning window, check the box to confirm that the contents of any disks you're adding to your pool will be lost, then click Continue. Your pool will be created.
¶ References
- ZFS Primer
- ZFS Introduction
- ZFS Pool Layout
- TrueNAS SCALE documentation - Pools
- TrueNaS CORE documentation - Pools
Pools can also include special vdevs, such as spares, metadata, cache, and SLOG. These advanced topics will not be covered by this guide ↩︎