¶ Modem/Router Configuration
I connect to the internet through one of these.
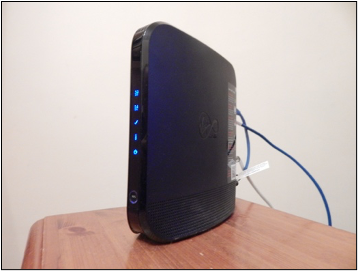
It is a modem/router (I will just use the word “router” from here on) with a firewall and DHCP server built into it. I like to call it a POS router (POS=Piece of Shit) because it’s always giving trouble.
This is how most people in the UK connect to the internet, via some sort of ISP supplied box (ISP= Internet Service Provider). Your setup might be different.
Whatever your setup, you need to reserve a group of IP addresses for the server to use. There are good reasons for doing this.
- By assigning static IP addresses (i.e. not changing) to the server we can always know where to find the IPMI web GUI and the TrueNAS web GUI. If the DHCP server in the router were to automatically assign these IP addresses to the TrueNAS server, then each time the router gets rebooted they could change. We would then need to go and find out what they had changed to, before we could once again use the IPMI and TrueNAS GUIs.
- The IP addresses for Jails can be kept out of the IP address range of the DHCP server in the router. Jails didn’t work properly for me until I did this.
I can’t tell you how to do this for your particular router as each one is different. This is how I did it for my setup, hopefully it will help you.
Type the IP address of your router’s web GUI into your browser.
The POS router’s web GUI address is:
192.168.0.1
(Yours might be different)
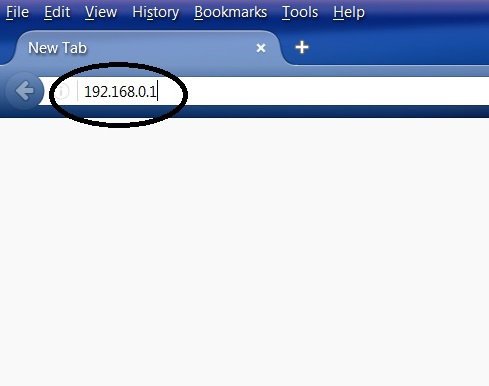
This brings up the POS router’s web GUI.

Now log in to your router.
Your router will have the details of the IP address range of your private network (the ones that sit behind your router’s firewall, not the public IP address).
On the POS router these are 192.168.0.0 – 192.168.0.254 (yours might be different).
Plan how you want to arrange the IP addresses and how many you want to reserve.
This is Fester’s attempt it may give you some ideas.
I thought about 50 IP addresses would be more than enough (i.e. 192.168.0.0 – 192.168.0.49).
The gateway address on the POS router is 192.168.0.1, so I kept away from this as I thought it might cause an IP address conflict if I used it. Therefore, in practice the IP addresses reserved for the server will start at 192.168.0.2 to avoid the gateway address.
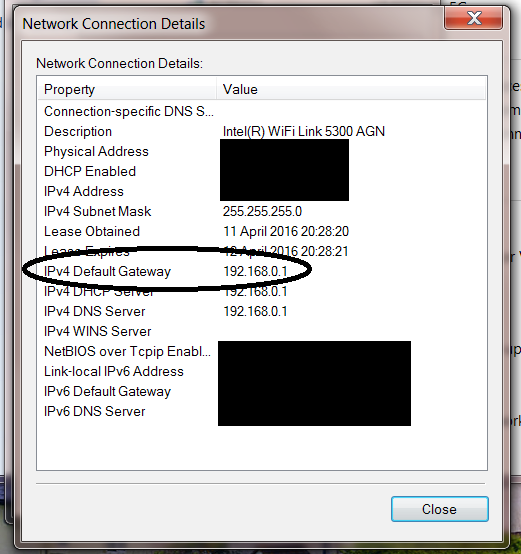
(Notice that the IPv4 Default Gateway IP address and the router’s web GUI address match. They are actually one in the same.)
I planned how I would use the IP address range 192.168.0.2 – 192.168.0.49 and made a little table.
| IP Address | Usage |
| 192.168.0.2 | IPMI of TrueNAS Server |
| 192.168.0.3 – 192.168.0.4 | Reserved for Future Servers That Require IPMI |
| 192.168.0.5 | NIC Of The TrueNAS Server |
| 192.168.0.6 – 192.168.0.49 | Reserved For Future Use (Jails, etc) |
I then reserved the first 50 IP addresses for the server by altering the IP address range of the DHCP Server in the POS router accordingly.
This is a slightly backwards way of doing things, but due to the limited options of the POS router this was the only practical way to do it. Your router might offer a more elegant solution than this.
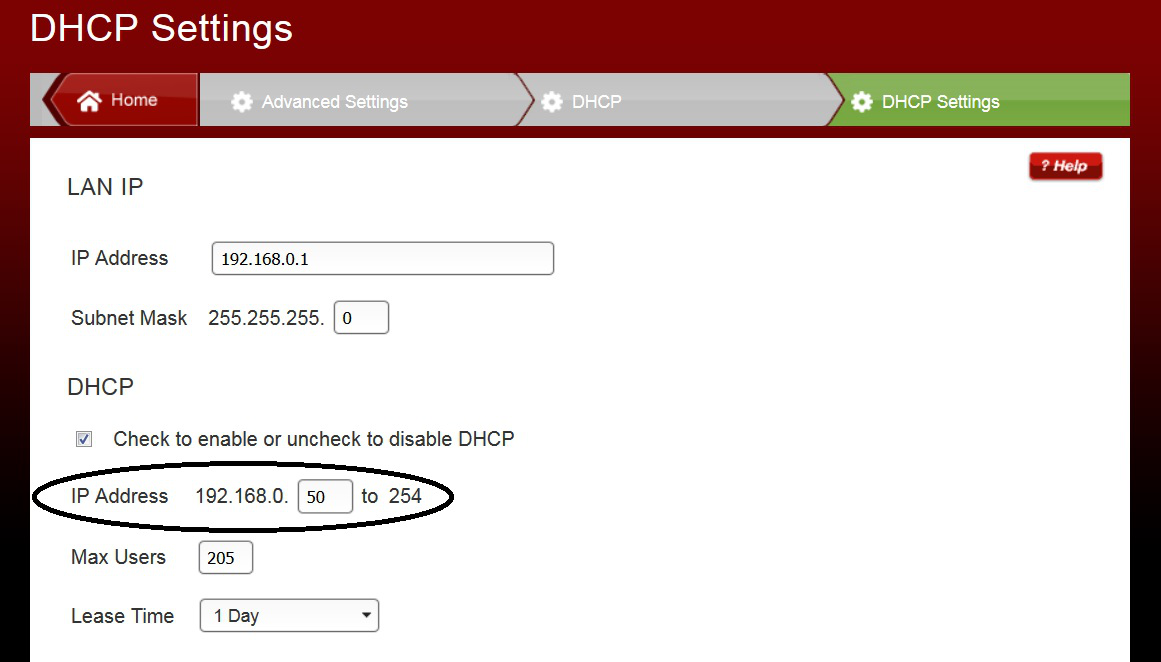
The value in the little box was changed from 0 to 50.
Also make a note of the subnet mask value, it will be needed later.
While I was in there I also set up email alerts so that the router informs me of anything it considers worthy of mention. You may want to consider this.
OK, that’s the router configured.
But what if you don’t know your router’s web GUI IP address?
¶ Finding The IP Address Of The Router’s GUI On A Windows Machine
If you have a Windows machine available that can connect to the router then you can find out (if your unsure use a machine that connects to the internet this should work).
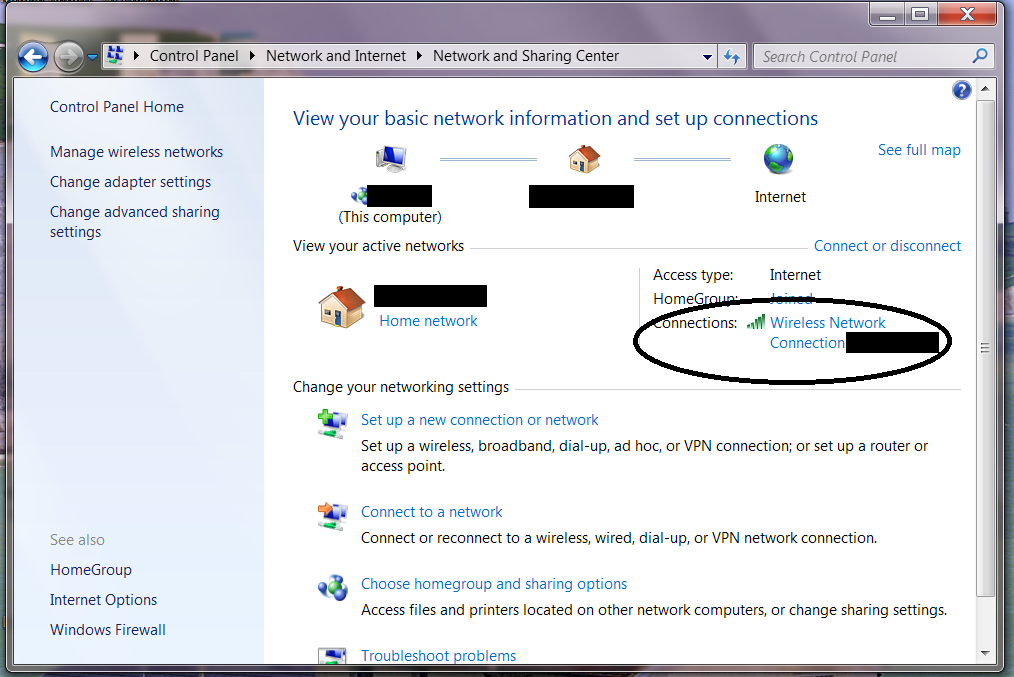
Click on the “Start” button and go into the “Control Panel” in Windows and select “Network and Sharing Centre” (this was on a Windows 7 machine).
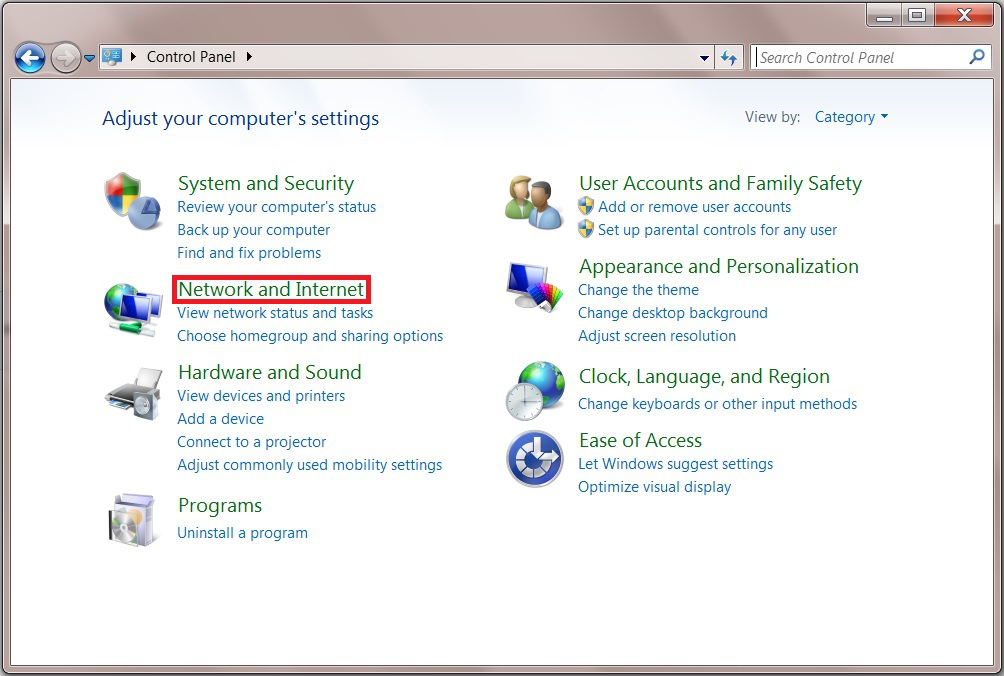
A new window will now pop-up. Click on the blue text next to “Connections”.
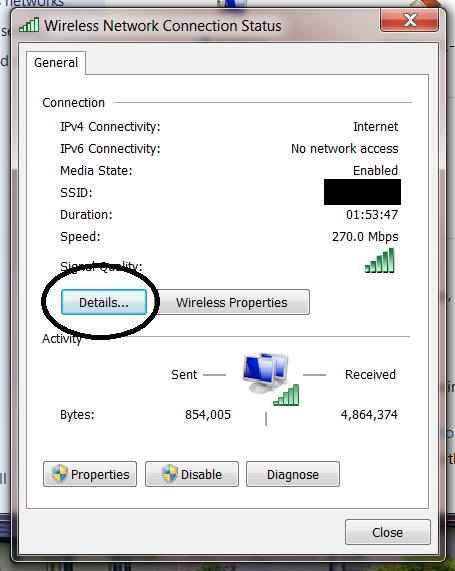
Another window will now pop-up. Click on the “Details” button.
Yet another window will now pop-up. The IP address listed by the “IPv4 Default Gateway” is the one you want.
If you don’t mind a CLI (Command Line Interface) here is a faster way.
Click on the START button in Windows (1) and type cmd in the “Search programs and files” text box (2) and press return, or click on the cmd icon at the top (3).

This should bring up the Windows default command-line interpreter, which is basically a window you can type commands into.
Type in ipconfig at the command prompt (1) and then note down the Default Gateway IP address (2), you should get something like this.
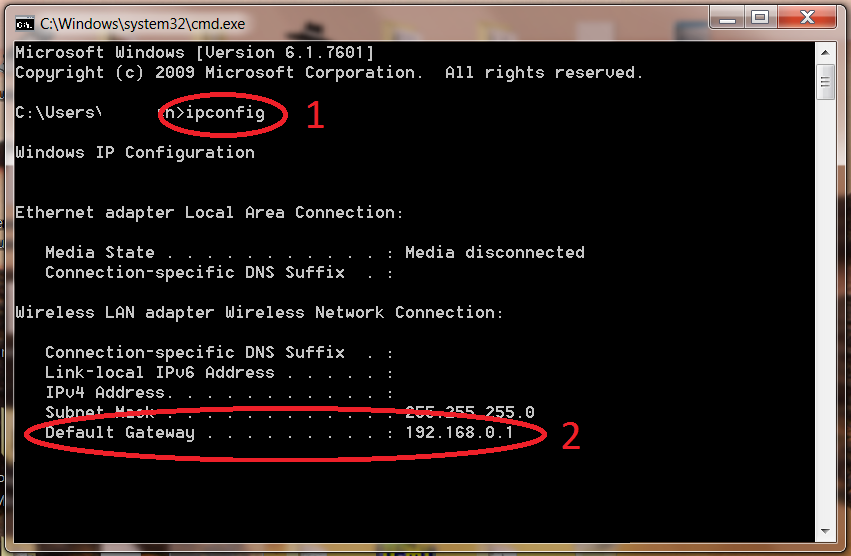
Also make a note of the subnet mask value, it will be needed later (it’s just above the Default Gateway).
¶ Finding The IP Address Of The Router’s GUI On A MAC
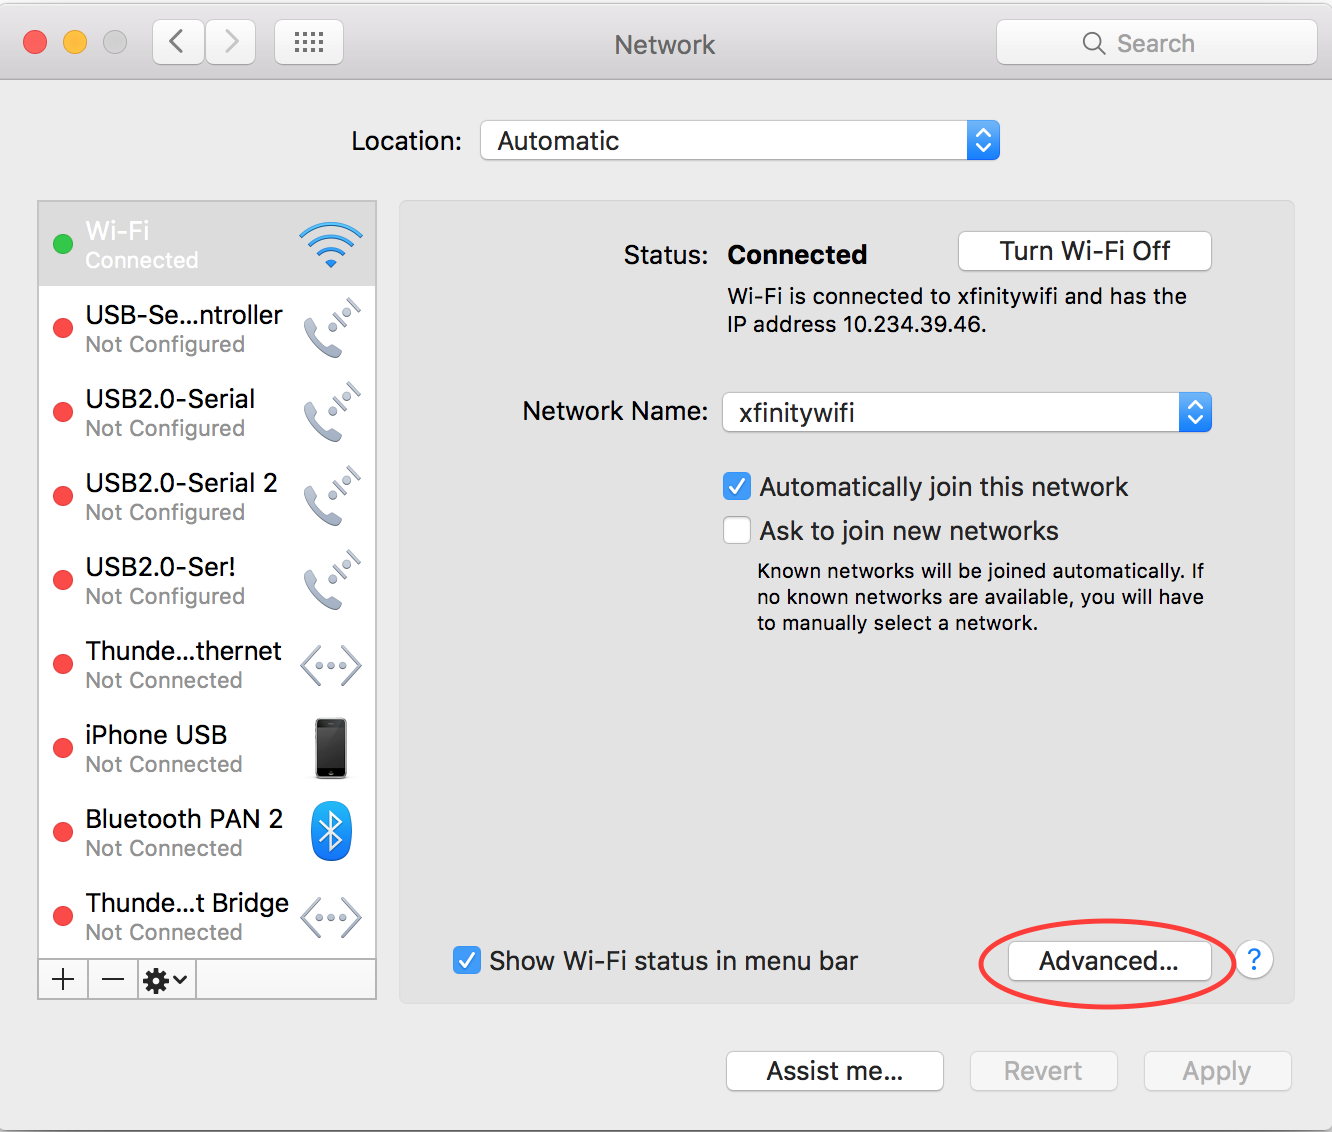
On a MAC go to “System Preferences” and click on “Network”.
Now click on the “Advanced” button on the screen that appears next.
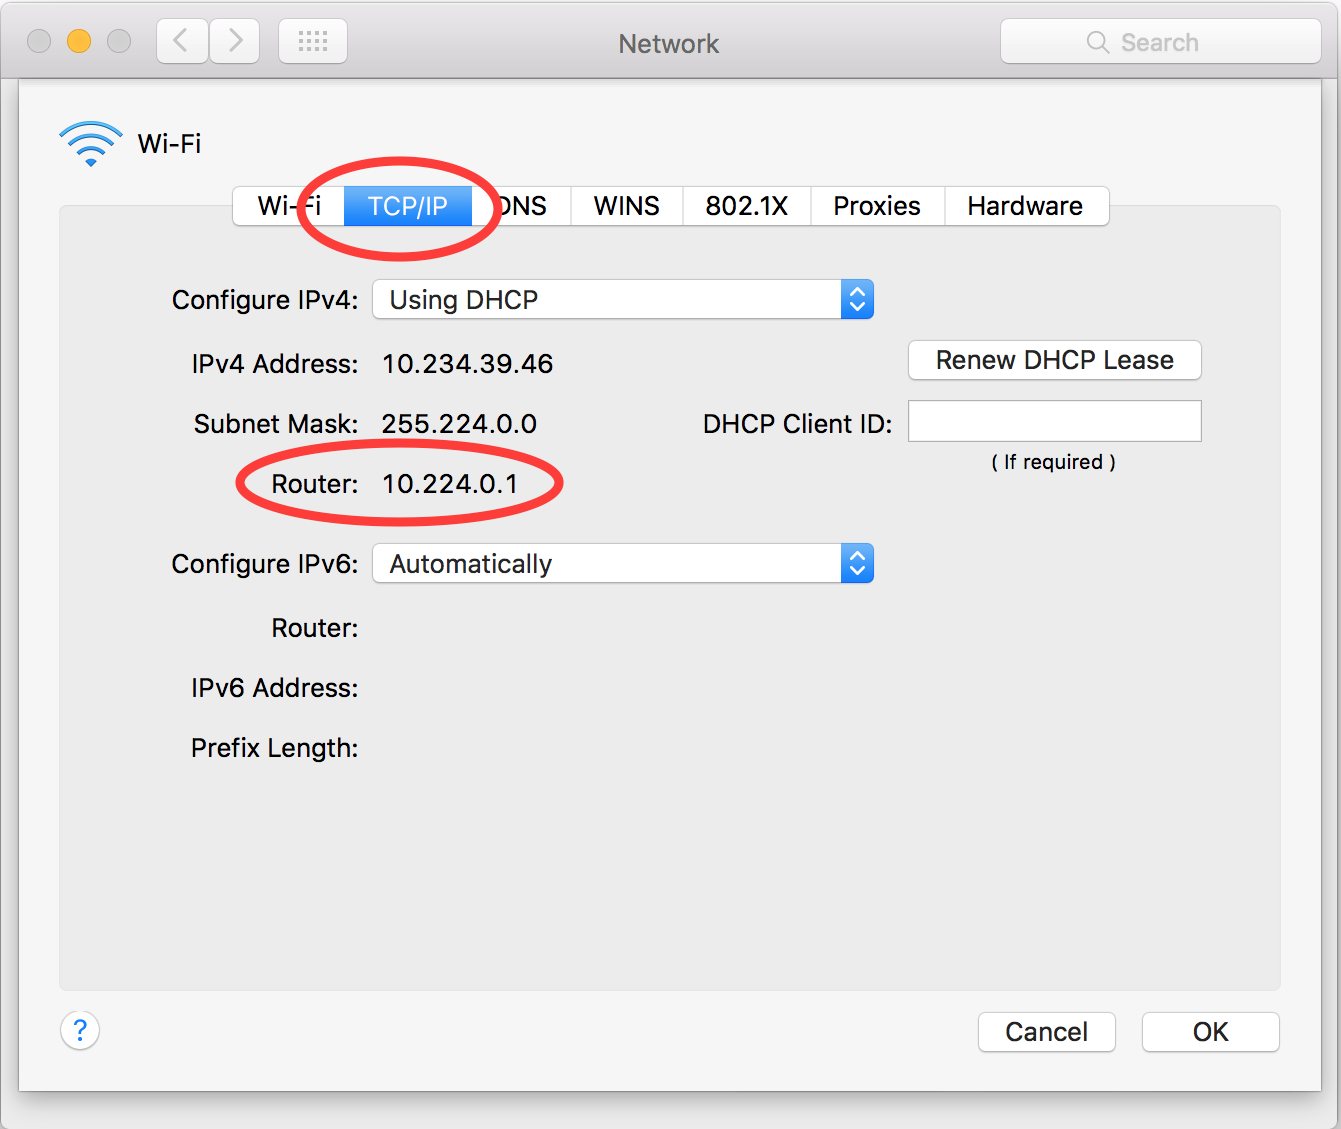
Select the “TCP/IP” tab on the next screen, and go down the list (it’s usually down the bottom) until you come to an entry called “Router”. The associated IP address is the one you want.
¶ Finding The IP Address Of The Router’s GUI On A Linux Machine
I can’t help you here because I don’t know how.
If someone would like to provide some information with copyright free screenshots I will try to include it in the guide or you could replace this or any section with your own?