¶ NTP Server Configuration
An NTP server (Network Time Protocol) is a server that basically communicates with the computers on your network to keep their clocks synchronised together.
TrueNAS defaults to NTP servers that are managed by the FreeBSD foundation, and in most cases these will be perfectly fine. However, you may have a reason to want to change this setting. So if you want to do this on your TrueNAS server, this is how.
First make sure that the TrueNAS server has been given the information it needs to find your ISPs DNS servers. This is done in the “Network → Global Configuration” page in the “Nameserver 1 – 3:” text boxes. If this has not been done then a URL (i.e. a webpage address) cannot be resolved to an IP address. In other words the server will not be able to find the resource it is looking for on the internet.
Now find a public NTP website for your country that provides the URLs for their NTP servers. Without those URLs your server will not find the resource and receive the synchronisation information.
I am based in the UK (Fester is British, a fact that has stupefied and shamed the British Nation for many years now) so I use http://www.pool.ntp.org/zone/uk for my TrueNAS server.
The URLs look like this.
0.uk.pool.ntp.org
1.uk.pool.ntp.org
2.uk.pool.ntp.org
3.uk.pool.ntp.org
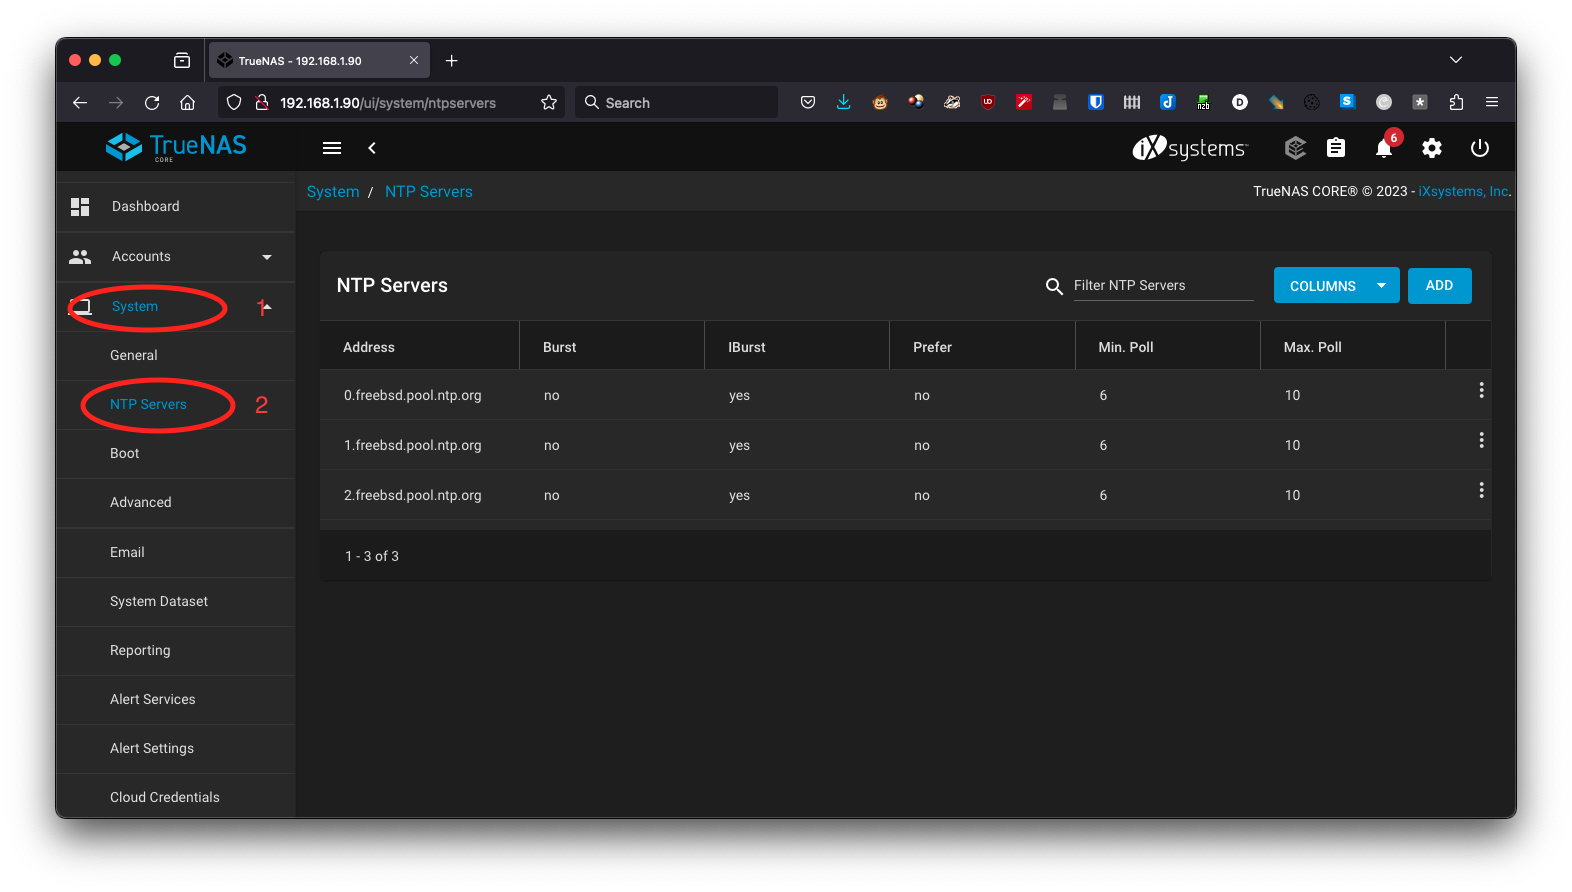
When you have this information go to the “System” page (1) and click on the “General” button (2).
This will bring up the page where the settings for the NTP servers reside.

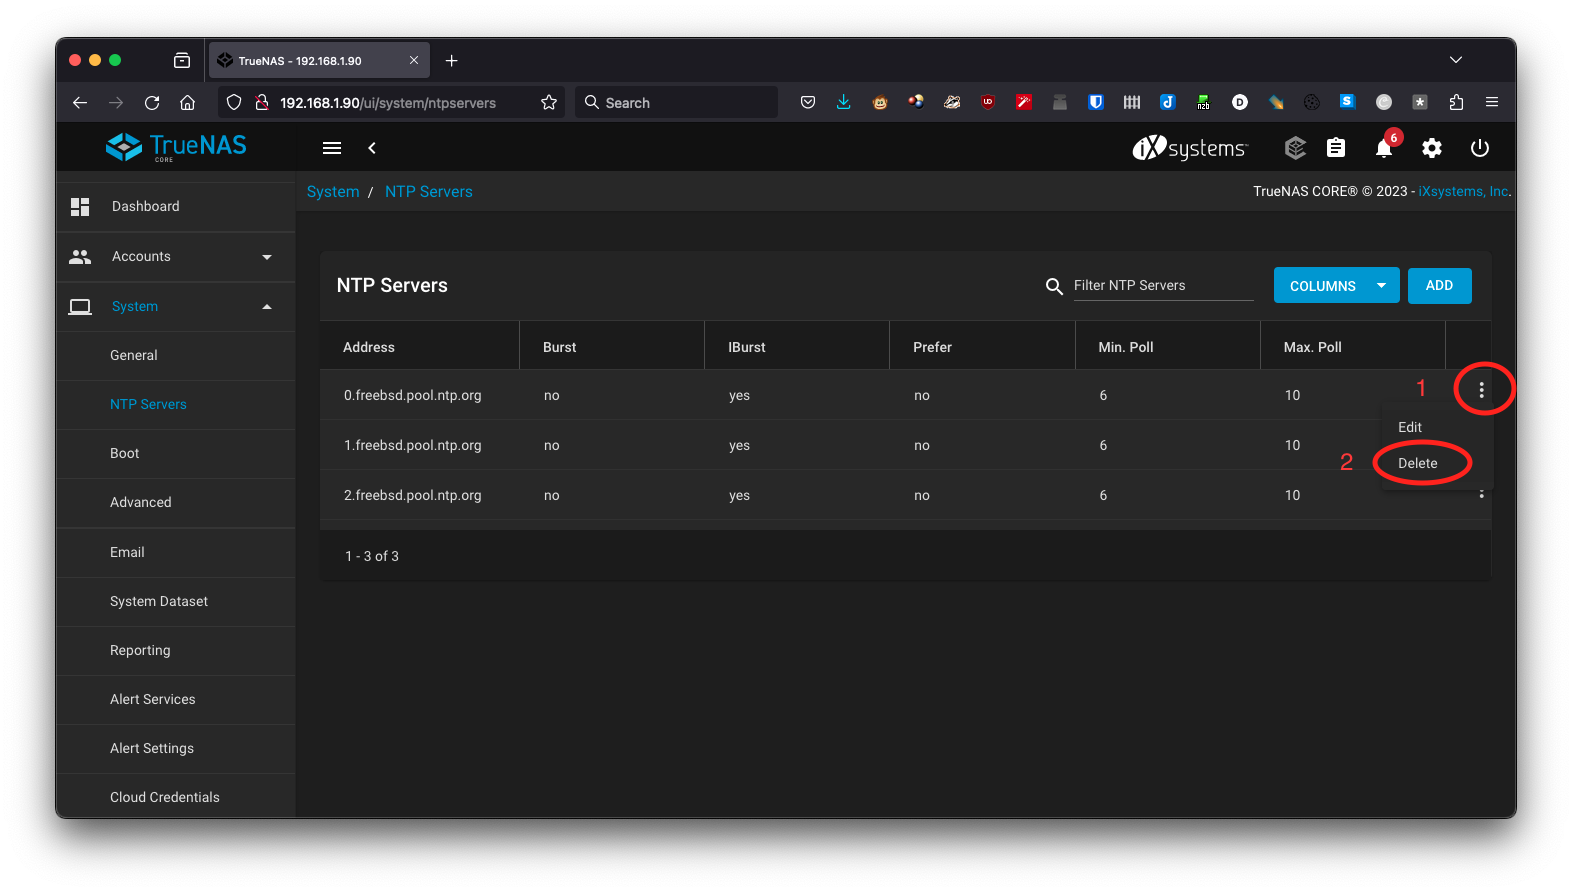
First delete all the default entries.
Click on the three dots to the right of the entry you want to delete (1).
Now click on the “Delete” button (2).
Repeat this for any further entries you need to delete.

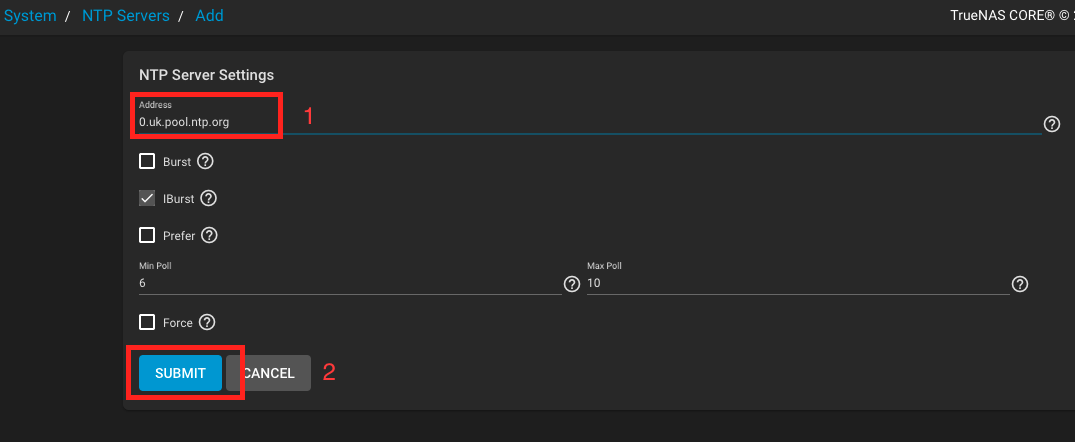
Now click on the “Add” button and a new window should pop up.
Enter the address of the NTP server in the “Address:” text box (1).
Leave every other setting at its default value.
Now click on the “SUBMIT” button (2).
Repeat this process for any other NTP servers you wish to add.

That’s the NTP servers configured.