¶ Self-signed Certificate for TrueNAS SCALE
¶ Introduction
TrueNAS creates a self-signed TLS certificate on installation, which is valid for about a year. Like any certificate, this will enable secure communication over HTTPS between a client system and your NAS. However, it will not be trusted by browsers, so you'll get certificate errors when you browse to your NAS via HTTPS.
When this certificate nears expiration, you'll begin to get alerts in the web interface (and by e-mail, if you have that configured). You can ignore them (you're already getting certificate errors if you're using a self-signed certificate), but the way to correct them is to generate a new self-signed certificate.
¶ Instructions
¶ Create a certificate authority
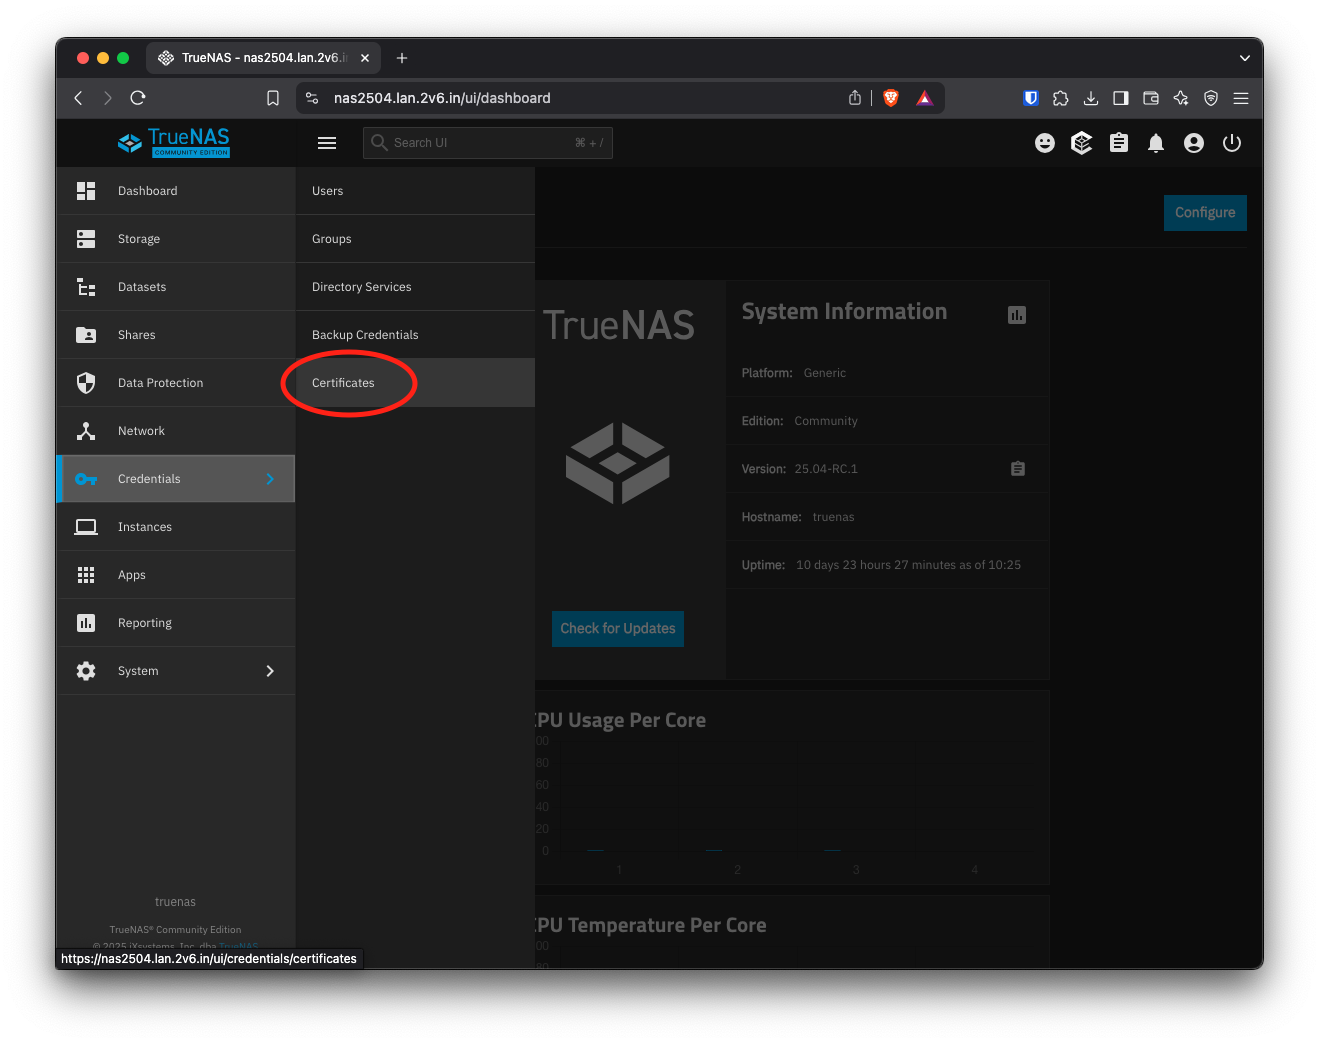
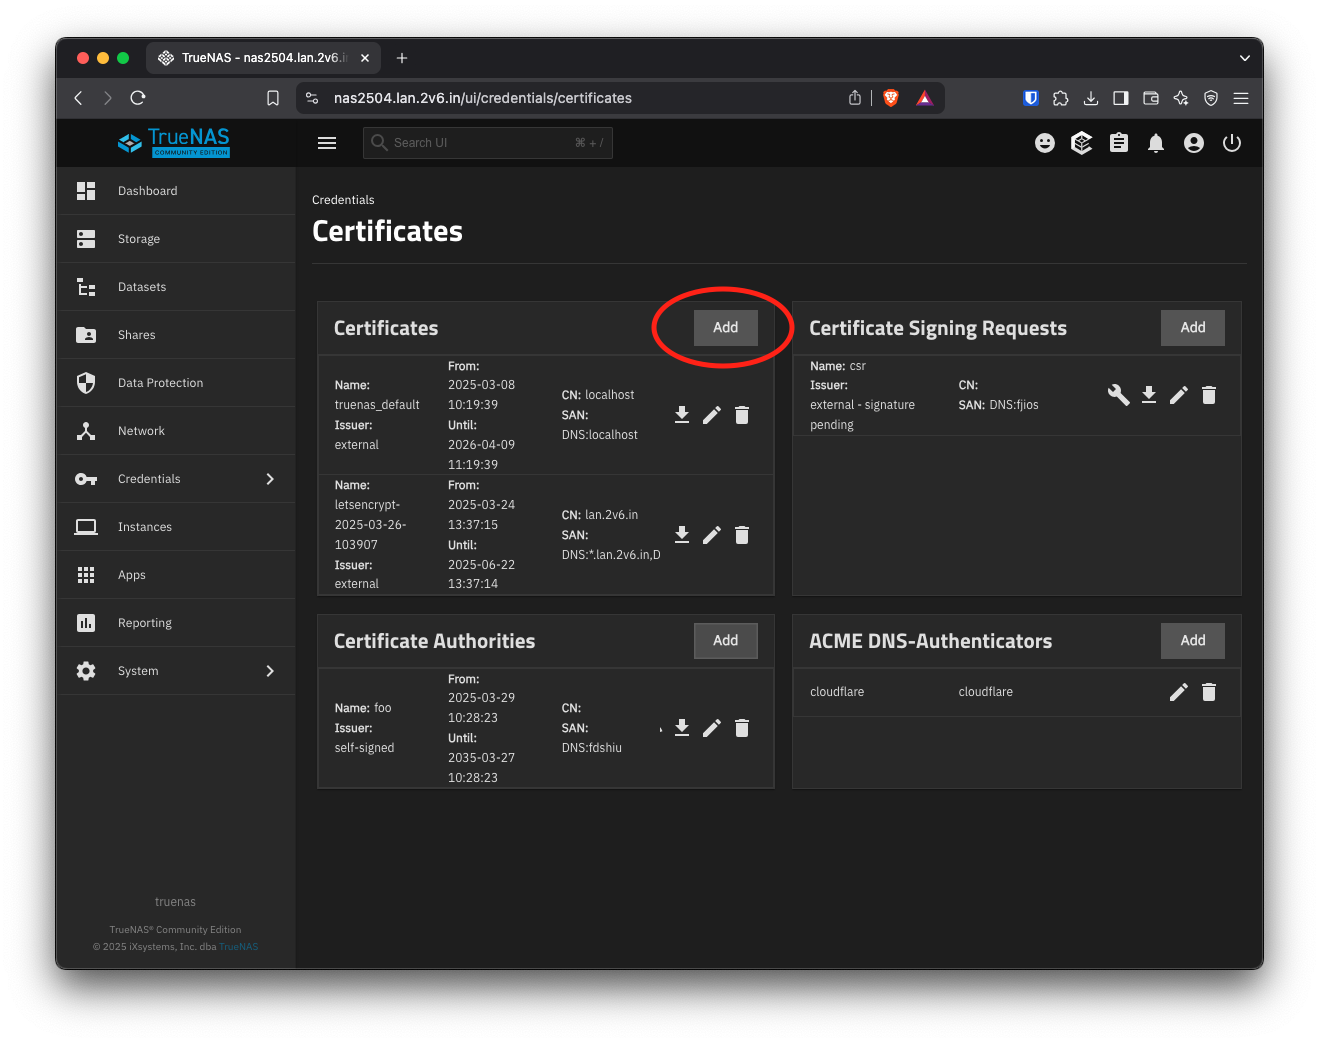
In the TrueNAS web interface, browse to Credentials -> Certificates.
Next to Certificate Authorities, click Add.
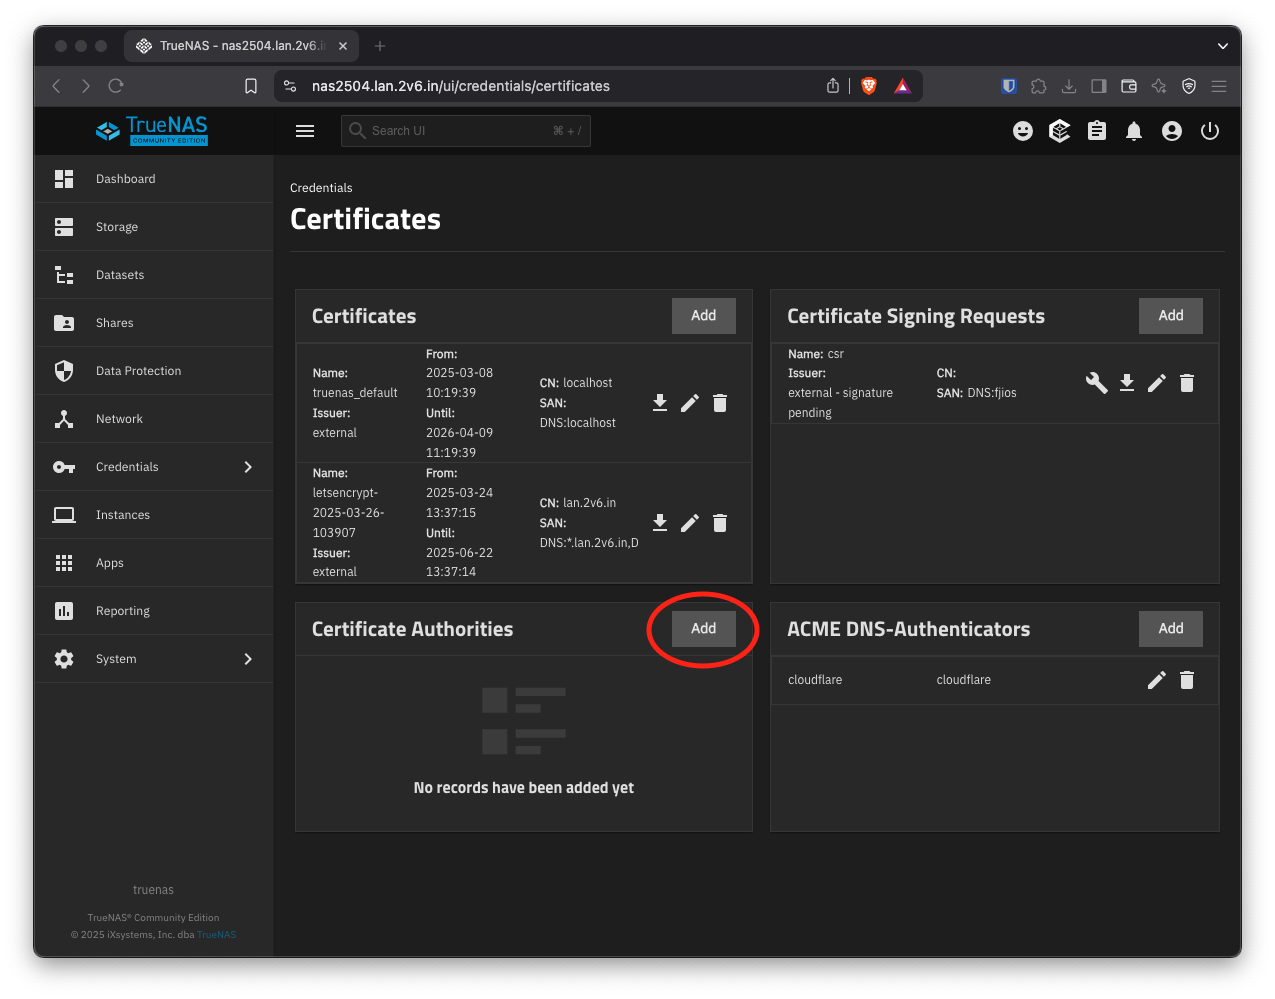
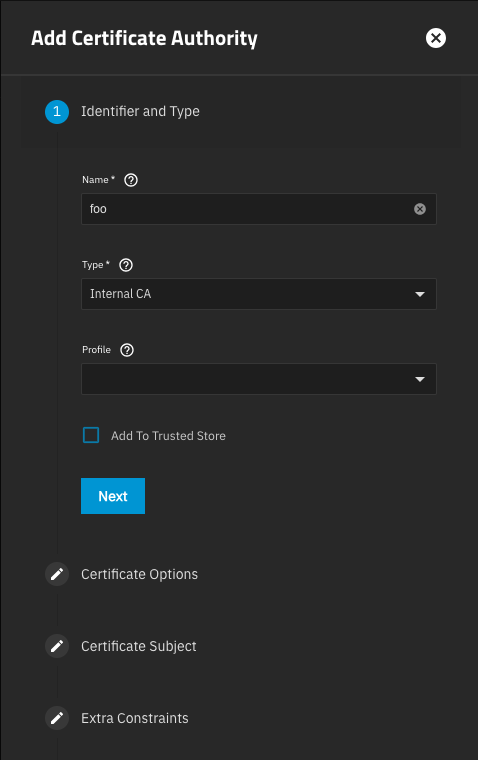
Step through the form that appears on the right, leaving the default values as they are, and filling in the mandatory fields as desired. Once you've finished, click Save.
Once you've created the certificate authority, click the download to the next to it.
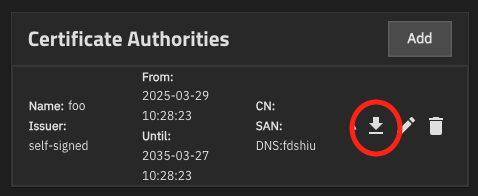
You can then download this certificate and import it into your browser or operating system's trust store, which will allow your browser to trust the certificate you're about to create.
¶ Create a certificate
Still at the Certificates page, click Add next to Certificates.
As before, step through the form, leaving the default values as they are and filling in the mandatory fields as desired. Under Profile in the first section (Identifier and Type), select one of the two HTTPS options. In the second section (Certificate Options), make sure Signing Certificate Authority matches the one you just created (it should be the default). You may also want to increase the lifetime; the default is 397 days, or just over a year.
In the third section (Certificate Subject), make sure you've entered all the addresses you'll use to access your NAS, whether they're hostnames, fully-qualified domain names, IP addresses, or some combination.
Step through the rest of the form and click Save.
¶ Configure your system
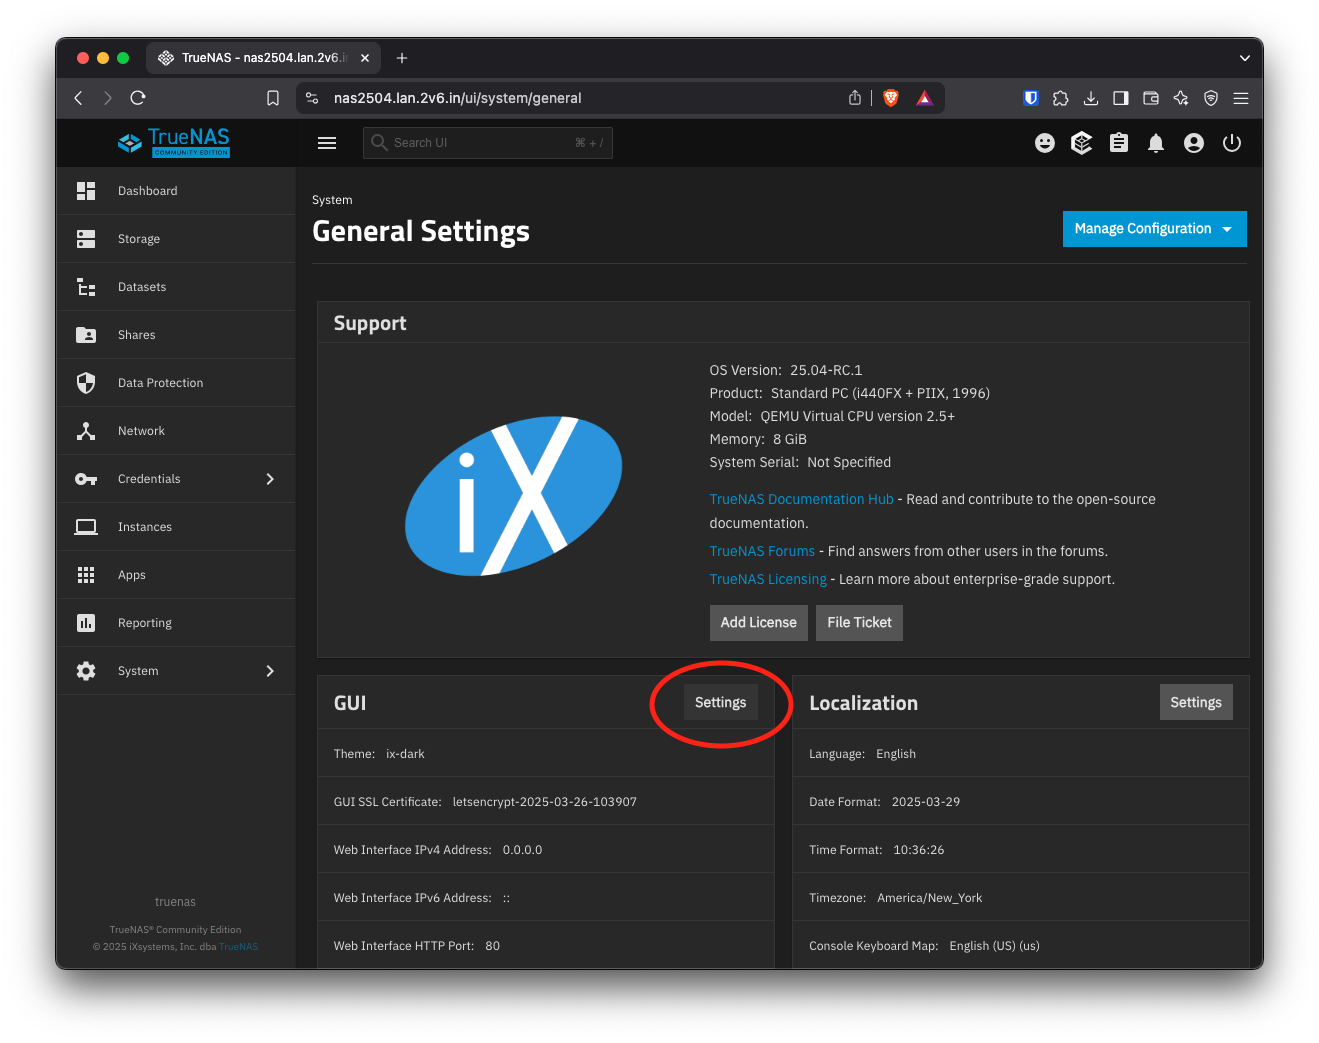
Now that you've created the certificate, you'll need to configure your NAS to use it. Browse to System -> General Settings, and click Settings to the right of GUI.
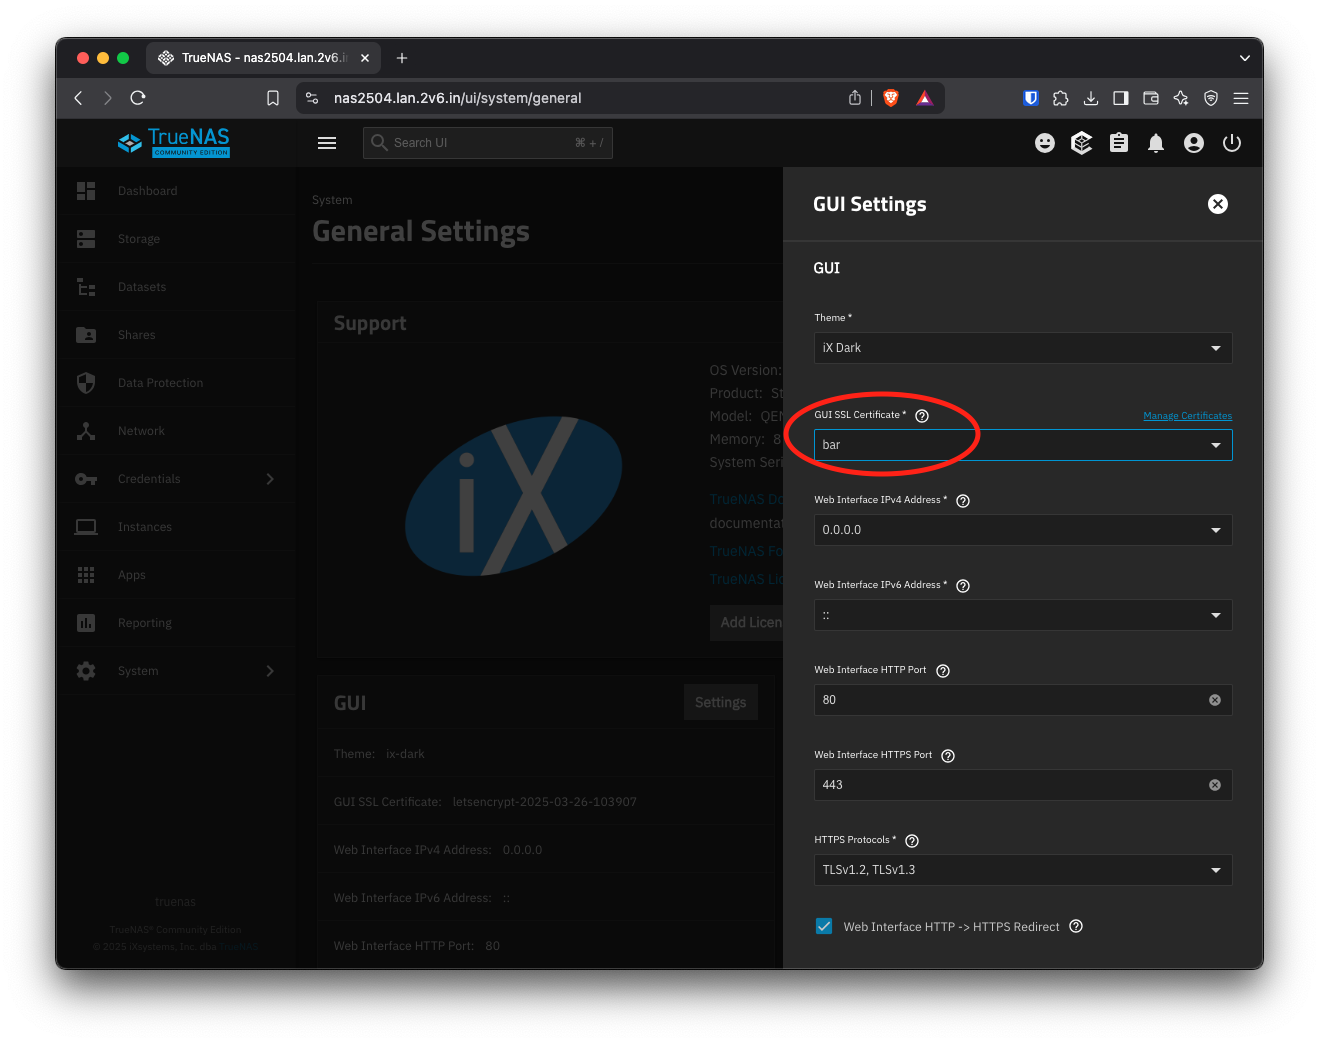
Then set GUI SSL Certificate to the one you just created and click Save.
If you've configured any other services to use a certificate (FTP would be the most likely candidate), set it to use the newly-created certificate as well. Browse to System -> Services, click the pencil next to the service in question, and set the correct certificate.
Similarly, if you've configured any apps to use the previous certificate, you'll need to tell them to use the new one instead. Browse to Apps, select the app, and click Edit. Change the certificate setting to match the new one.
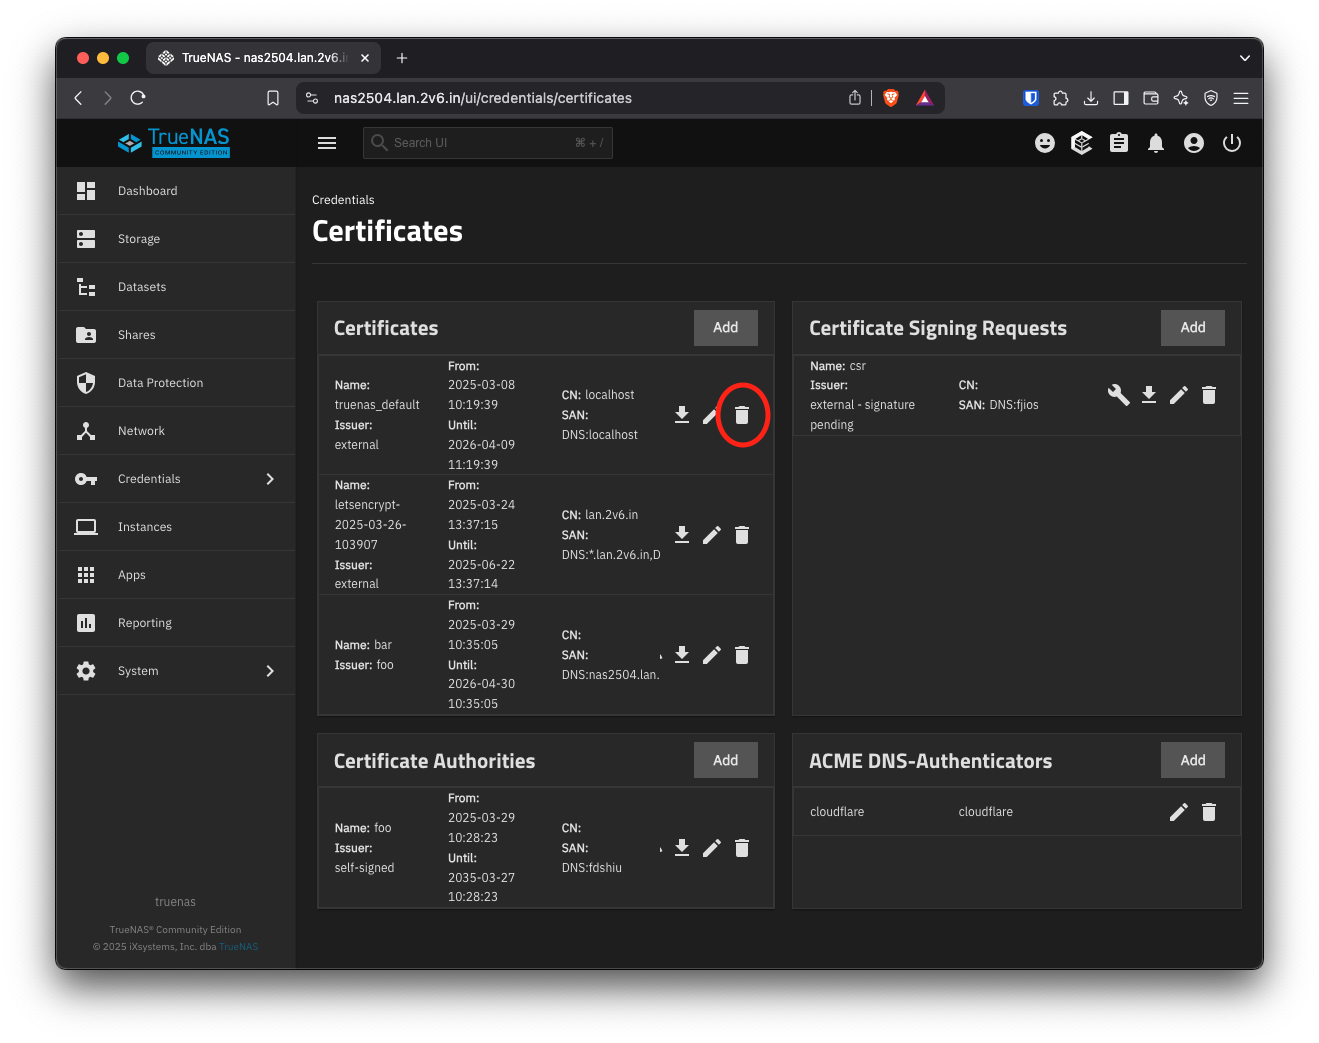
¶ Delete the old certificate
The system will continue to alert you to the expired certificate until you delete it. To do so, browse to System -> Certificates, click the delete button to the right of the old certificate.