Many of the procedures in this guide require writing an image file (usually the file name ends in .img or .iso) to a USB stick, so that you can boot from that stick. Here's how you can do that.
¶ Balena Etcher
Balena Etcher is a piece of free software for Windows, macOS, and Linux. You can download it from their website.
Once you've downloaded Etcher, launch it.
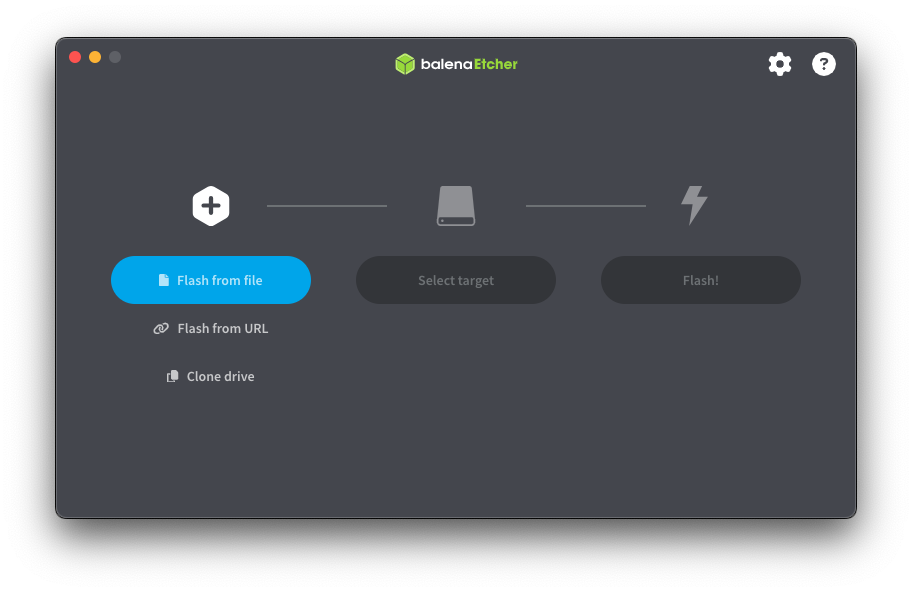
In the window, click on “Flash from file” (highlighted in blue above), then browse to the image file you want to flash.
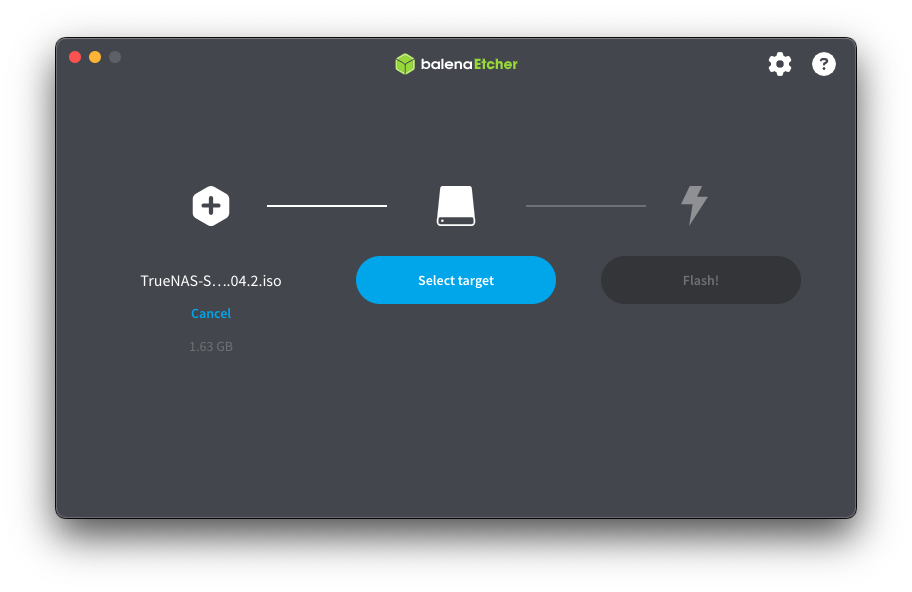
In the next window, click “Select target,” and then choose your USB device.
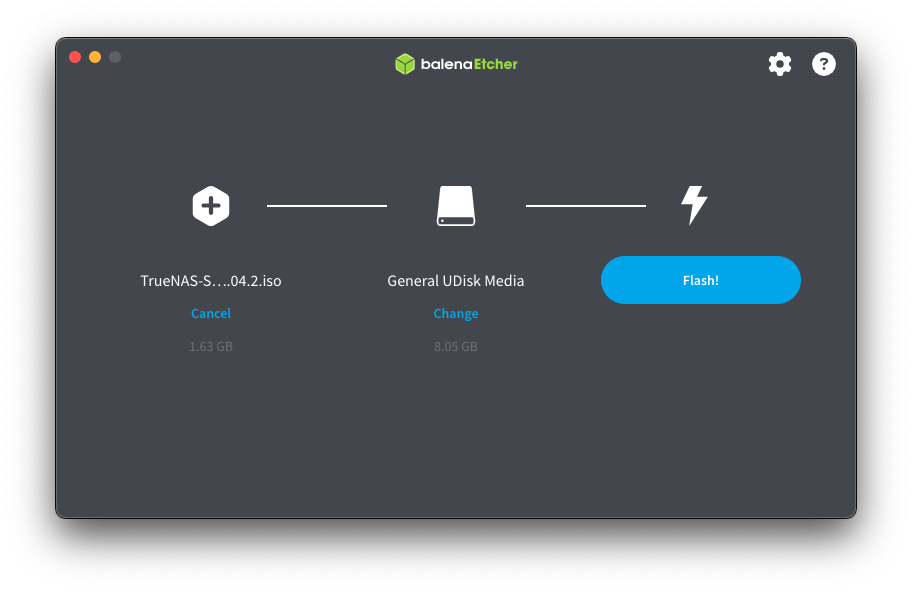
In the last window, click on “Flash!” Etcher will write the image file to your USB stick, verify it was written correctly, and inform you that it's complete.
¶ Windows
Download the program “Win32DiskImager” to your Windows machine.
Now run the “Win32DiskImager” installer under an administrator’s account or right click on it and run as an administrator (have your administrator’s password ready).
When the program is installed run it under an Administrator’s account or right click and run as Administrator.
Now insert the USB stick you intend to use and wait for the computer to recognise it.
Click the small folder icon (1) and navigate to the location of the image file and select it. Now select the USB device by clicking the drop down selector under “Device” (2) if it isn’t already selected.
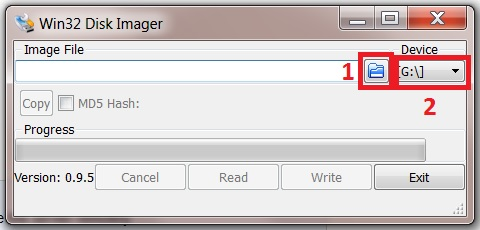
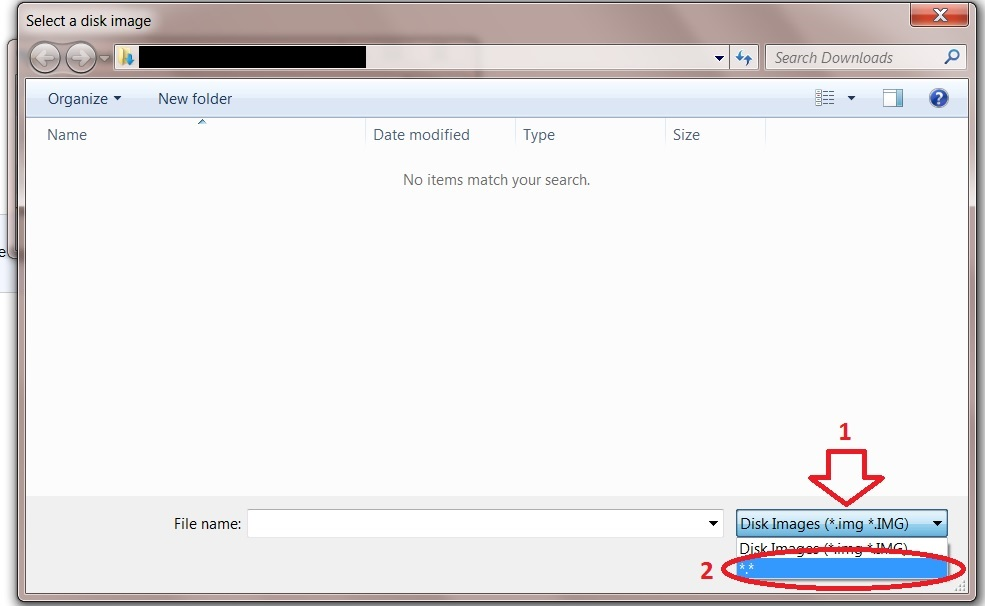
If you cannot see the image file and you know you are in the correct location then click on the drop down selector that determines the file type to be displayed (1) (this will likely be initially set to display only IMG files, if your image is in the form of an ISO file it won’t be shown) and chose the wild card “*.*” (2) this will display all files present.
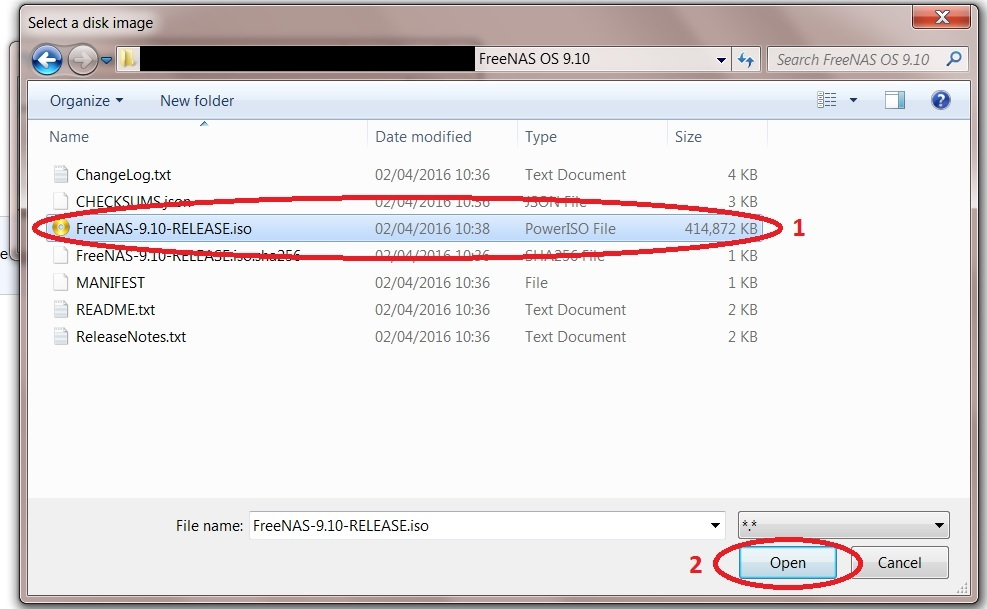
The image file should now appear.Now select it (1) and click “Open” (2).
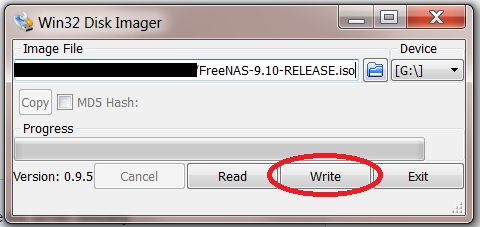
With the image file now loaded click on the “Write” button to begin making the bootable USB installer.
At this point a small window will pop up giving a “confirm write” warning message, click the “Yes” button to proceed.
The image file will now be written to your USB stick.
When the process completes successfully a small window will pop up with “Write Successful” displayed. Click the “OK” button.
Close the application and eject the USB stick.
¶ Mac OS X
If you don't want to use Etcher, the “old-school” way to flash a USB stick on a Mac is to use dd. First, insert your USB stick. You'll then need to identify it by running diskutil list:
╰─ diskutil list                                                                                                                 ─╯
/dev/disk0 (internal, physical):
   #:                       TYPE NAME                    SIZE       IDENTIFIER
   0:      GUID_partition_scheme                        *2.0 TB     disk0
   1:                        EFI EFI                     314.6 MB   disk0s1
   2:                 Apple_APFS Container disk1         2.0 TB     disk0s2

/dev/disk1 (synthesized):
   #:                       TYPE NAME                    SIZE       IDENTIFIER
   0:      APFS Container Scheme -                      +2.0 TB     disk1
                                 Physical Store disk0s2
   1:                APFS Volume Macintosh HD            10.3 GB    disk1s1
   2:              APFS Snapshot com.apple.os.update-... 10.3 GB    disk1s1s1
   3:                APFS Volume Macintosh HD - Data     1.9 TB     disk1s2
   4:                APFS Volume Preboot                 2.2 GB     disk1s3
   5:                APFS Volume Recovery                1.2 GB     disk1s4
   6:                APFS Volume VM                      7.5 GB     disk1s5

/dev/disk2 (external, physical):
   #:                       TYPE NAME                    SIZE       IDENTIFIER
   0:      GUID_partition_scheme                        *2.0 TB     disk2
   1:                        EFI EFI                     209.7 MB   disk2s1
   2:                 Apple_APFS Container disk3         2.0 TB     disk2s2

/dev/disk3 (synthesized):
   #:                       TYPE NAME                    SIZE       IDENTIFIER
   0:      APFS Container Scheme -                      +2.0 TB     disk3
                                 Physical Store disk2s2
   1:                APFS Volume SanDisk                 749.6 KB   disk3s1

/dev/disk4 (external, physical):
   #:                       TYPE NAME                    SIZE       IDENTIFIER
   0:     FDisk_partition_scheme                        *8.1 GB     disk4
1: DOS_FAT_32 DATAOCEAN 8.1 GB disk4s1In the output of this command, you'll need to identify your USB stick; you can usually do this by checking the size. In this example, I'm using a 8 GB USB stick, so that appears as /dev/disk4.
Next, you'll need to unmount any volumes on that device. Do that by running diskutil unmountDisk /dev/disk4, replacing disk4 with the device you determined above.
Next, write the image to the device:
╰─ sudo dd status=progress if=TrueNAS-SCALE-24.04.2.iso of=/dev/rdisk4 bs=1m                                                     ─╯
Password:
  1621098496 bytes (1621 MB, 1546 MiB) transferred 100.008s, 16 MB/s
1554+1 records in
1554+1 records out
1630404608 bytes transferred in 100.573273 secs (16211112 bytes/sec)Note three things in this command:
- The file name designated by
if=should be updated to match the file you're actually flashing - The output device identified by
of=needs to match the device you determined above - The output device needs a leading
r--instead ofdisk4, it'srdisk4.
Once that completes, you can eject the USB stick by running diskutil eject /dev/disk4.
¶ Linux, FreeBSD, or other Unix-like OS
Since macOS is built on BSD, any other Unix variant will be similar, differing in (1) the lack of diskutil commands, and (2) the method you'll use to identify the USB stick. On Linux, lsblk will list block devices; on FreeBSD, camcontrol devlist will do the job. You won't likely need to unmount or eject the device, and you won't need to prefix the device name with r.